

Introduction to DIY Solar Power
Why Choose Solar Power?
Solar power is an increasingly popular choice for homeowners and businesses alike, and for good reason. By harnessing the energy of the sun, you can significantly reduce your reliance on traditional fossil fuels, which are both finite and environmentally damaging. Solar power is a clean, renewable energy source that can help reduce your carbon footprint and contribute to a more sustainable future. Additionally, with the cost of solar panels and related technology decreasing over the years, solar power has become more accessible and affordable than ever before.
Benefits of DIY Solar Projects
Embarking on a DIY solar project offers numerous benefits beyond the obvious environmental advantages. Here are some key reasons to consider going the DIY route:
- Cost Savings: By installing your own solar panels, you can save a significant amount on labor costs. Professional installation can be expensive, and doing it yourself allows you to allocate more of your budget to high-quality materials.
- Customization: A DIY project gives you complete control over the design and implementation of your solar power system. You can tailor the setup to meet your specific energy needs and preferences.
- Learning Experience: Taking on a DIY solar project can be an educational and rewarding experience. You’ll gain valuable knowledge about solar technology, electrical systems, and sustainable living practices.
- Sense of Accomplishment: Successfully completing a DIY solar installation can provide a great sense of pride and accomplishment. You’ll have the satisfaction of knowing that you contributed to a greener planet through your own efforts.
Understanding Solar Energy Basics
Before diving into a DIY solar project, it’s essential to understand the basics of solar energy and how it works. Solar power systems convert sunlight into electricity using photovoltaic (PV) cells, which are typically made of silicon. When sunlight hits these cells, it excites the electrons, creating an electric current. This direct current (DC) electricity is then converted into alternating current (AC) electricity by an inverter, making it suitable for use in your home or business.
Key components of a solar power system include:
- Solar Panels: These are the primary components that capture sunlight and convert it into electricity. They come in various types, including monocrystalline, polycrystalline, and thin-film panels, each with its own advantages and efficiency levels.
- Inverter: This device converts the DC electricity generated by the solar panels into AC electricity, which can be used to power your appliances and devices.
- Mounting System: Solar panels need to be securely mounted on your roof or the ground. The mounting system ensures that the panels are positioned at the optimal angle to capture the most sunlight.
- Battery Storage (Optional): For those looking to store excess energy for use during cloudy days or at night, battery storage systems can be integrated into the solar setup.
- Charge Controller: This component regulates the flow of electricity to and from the battery storage system, preventing overcharging and extending battery life.
Understanding these basics will provide a solid foundation as you move forward with your DIY solar project. With the right planning and preparation, you can successfully harness the power of the sun to meet your energy needs.
Planning Your DIY Solar Project
Assessing Your Energy Needs
Before diving into a DIY solar project, it’s crucial to understand your energy consumption. Start by reviewing your electricity bills to determine your average monthly and annual energy usage, measured in kilowatt-hours (kWh). This will help you size your solar system appropriately. Consider any future changes in energy use, such as the addition of electric vehicles or home expansions, which might increase your energy needs.
Choosing the Right Location
The location of your solar panels significantly impacts their efficiency. Ideally, panels should be installed on a south-facing roof with minimal shading throughout the day. If your roof is not suitable, consider ground-mounted systems. Use tools like solar pathfinders or online solar calculators to assess the solar potential of different locations on your property. Ensure the chosen spot receives ample sunlight year-round to maximize energy production.
Budgeting and Cost Considerations
Budgeting is a critical step in planning your DIY solar project. The cost of a DIY solar system can range from $7,000 to $18,000 before tax credits. This includes the price of solar panels, inverters, mounting hardware, wiring, and other necessary components. Additionally, factor in costs for permits, inspection fees, and any potential upgrades to your electrical system. While DIY projects can save on labor costs, they do not qualify for certain incentives and warranties available through professional installations. Weigh the initial savings against the long-term benefits and potential risks.
Gathering Necessary Tools and Materials
To successfully install a DIY solar system, you’ll need a variety of tools and materials. Here’s a checklist to get you started:
- Solar Panels: Choose panels based on your energy needs and available space.
- Inverters: Decide between string inverters and microinverters based on your system design.
- Mounting Hardware: Includes rails, clamps, and brackets for securing panels to your roof or ground mount.
- Wiring and Electrical Components: Ensure you have the correct gauge wires, connectors, and junction boxes.
- Safety Gear: Harnesses, gloves, and safety glasses to protect yourself during installation.
- Tools: Drill, screwdrivers, wrenches, and a multimeter for electrical testing.
Gathering all necessary tools and materials before starting the project will help streamline the installation process and reduce the likelihood of delays.
By carefully planning your DIY solar project, you can ensure a smooth installation process and maximize the efficiency and longevity of your solar power system.
Selecting and Sizing Solar Panels
Types of Solar Panels
When selecting solar panels for your DIY project, it’s essential to understand the different types available. The three main types are monocrystalline, polycrystalline, and amorphous panels.
- Monocrystalline Panels: These panels are made from a single crystal structure, making them the most efficient and space-saving option. They are typically more expensive but offer higher efficiency and longevity.
- Polycrystalline Panels: Made from multiple crystal structures, these panels are less efficient than monocrystalline panels but are more affordable. They are a good middle-ground option for those balancing cost and efficiency.
- Amorphous Panels: Also known as thin-film panels, these are the least efficient and are generally used for small-scale applications like calculators and watches. They are flexible and lightweight but not suitable for most home solar projects.
Calculating Power Requirements
Before purchasing solar panels, you need to calculate your power requirements to ensure your system can meet your energy needs. Here’s how to do it:
- Assess Your Energy Consumption: Review your electricity bills to determine your average monthly and annual energy consumption in kilowatt-hours (kWh).
- Determine Peak Sun Hours: Calculate the average number of peak sun hours your location receives per day. This information is crucial for estimating how much energy your panels can generate.
- Calculate System Size: Use the formula: System Size (kW) = Daily Energy Consumption (kWh) / Peak Sun Hours. This will give you an estimate of the total capacity needed for your solar panel system.
Panel Efficiency and Performance
The efficiency of a solar panel refers to the percentage of sunlight it can convert into usable electricity. Higher efficiency panels generate more power in a smaller space, which is particularly beneficial if you have limited roof space.
- Monocrystalline Panels: Typically have an efficiency rate of 15-20%.
- Polycrystalline Panels: Generally offer 13-16% efficiency.
- Amorphous Panels: Usually have an efficiency rate of 6-10%.
When evaluating panel performance, consider factors such as temperature coefficient, which indicates how well a panel performs in high temperatures, and degradation rate, which shows how much efficiency a panel loses each year.
Mounting Options and Considerations
Choosing the right mounting system is crucial for the safety and efficiency of your solar panel installation. Here are the main options:
- Roof Mounts: Ideal for homes with sufficient roof space and good sun exposure. Roof mounts can be more challenging to install and may require drilling into the roof, which can risk leaks if not done correctly.
- Ground Mounts: Suitable for properties with ample land. Ground mounts are easier to install and maintain but require more space and can be more expensive due to additional mounting hardware.
- Pole Mounts: These are elevated mounts that can be adjusted for optimal sun exposure. They are more flexible but also more costly and complex to install.
When selecting a mounting system, consider factors such as the angle and orientation of your panels, local weather conditions, and the structural integrity of your roof or ground area. Proper mounting ensures maximum efficiency and longevity of your solar power system.
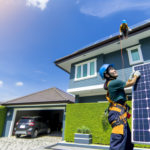
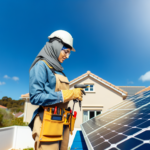
Installation Process
Safety Precautions
Before diving into the installation process, it’s crucial to prioritize safety. Working with solar panels involves heights, electrical components, and heavy equipment, all of which pose potential hazards. Here are some essential safety precautions:
- Personal Protective Equipment (PPE): Always wear appropriate PPE, including gloves, safety glasses, and a hard hat. If working on a roof, use a safety harness and secure it properly.
- Electrical Safety: Ensure all electrical components are de-energized before handling. Use insulated tools and follow proper grounding procedures to prevent electrical shocks.
- Weather Conditions: Avoid working in adverse weather conditions such as rain, snow, or high winds, which can increase the risk of accidents.
- Proper Lifting Techniques: Solar panels and mounting equipment can be heavy. Use proper lifting techniques to avoid back injuries and, if necessary, seek assistance.
Step-by-Step Installation Guide
Installing a DIY solar power system involves several steps. Here’s a simplified guide to help you through the process:
- Install the Mounting System: Begin by installing the racking system on your roof or ground mount. Use a chalk line to mark the installation points and ensure they are aligned. Secure the mounts with lag bolts, ensuring they are properly sealed to prevent leaks.
- Attach the Solar Panels: Once the mounting system is in place, attach the solar panels. Secure them with mid-clamps and end-clamps, ensuring they are tightly fastened to withstand wind and other environmental factors.
- Install Microinverters: If using microinverters, attach them to the mounting rails and connect them to each solar panel. This setup maximizes the efficiency of each panel and simplifies the wiring process.
- Grounding: Connect a grounding wire across the mounting system to ensure safety. This step is crucial for protecting your system from electrical surges and lightning strikes.
- Install Junction Box: Drill a hole in the roof to install a junction box. This box will house the connections from the solar panels to the inverter and the home’s electrical system.
Wiring and Connections
Proper wiring and connections are vital for the efficient and safe operation of your solar power system. Here’s how to handle this step:
- DC Wiring: Connect the positive and negative wires from each solar panel to the microinverters or a central inverter. Ensure all connections are secure and weatherproof.
- AC Wiring: From the inverter, run the AC wiring to your home’s electrical panel. This may involve installing a conduit to protect the wires and ensure compliance with local electrical codes.
- Grounding: Ensure all components, including the panels, inverters, and mounting system, are properly grounded. This step is crucial for safety and system longevity.
- Disconnect Switches: Install disconnect switches to allow for safe maintenance and emergency shutdowns. These switches should be easily accessible and clearly labeled.
Testing Your System
Once the installation and wiring are complete, it’s time to test your system to ensure everything is functioning correctly:
- Initial Inspection: Before turning on the system, perform a thorough inspection of all components and connections. Look for any loose wires, improper connections, or potential hazards.
- Power On: Turn on the system and monitor the inverter’s display or your monitoring app to ensure the system is generating power. Check for any error messages or warnings.
- Performance Testing: Measure the output of your solar panels and compare it to the expected performance based on your calculations. This step helps identify any issues with panel efficiency or shading.
- Final Inspection: Schedule a final inspection with your local authority having jurisdiction (AHJ) to ensure the system complies with all local codes and regulations. Once approved, you can connect to the grid if you have a grid-tied system.
By following these steps and prioritizing safety, you can successfully install your DIY solar power system and start enjoying the benefits of renewable energy.
Power Management and Storage
Understanding Inverters
Inverters are a crucial component of any solar power system. They convert the direct current (DC) electricity generated by solar panels into alternating current (AC) electricity, which is what most household appliances use. There are several types of inverters to consider:
- String Inverters: These are the most common and cost-effective type. They connect a series of solar panels (a string) to a single inverter. However, their efficiency can be affected if one panel underperforms due to shading or dirt.
- Microinverters: These are installed on each individual solar panel, allowing each panel to operate independently. This setup maximizes efficiency but is more expensive.
- Power Optimizers: These are a middle ground between string inverters and microinverters. They are installed on each panel to optimize its output before sending the DC electricity to a central inverter.
Choosing the right inverter depends on your specific needs, budget, and the layout of your solar array.
Battery Storage Options
Battery storage systems allow you to store excess solar energy for use when the sun isn’t shining. This is particularly useful for off-grid systems or for providing backup power during outages. Here are the main types of batteries used in solar systems:
- Lead-Acid Batteries: These are the most affordable but have a shorter lifespan and lower efficiency compared to other types.
- Lithium-Ion Batteries: These are more expensive but offer higher efficiency, longer lifespan, and better performance. They are the most popular choice for residential solar systems.
- Flow Batteries: These are less common but offer the advantage of being able to discharge 100% of their stored energy without damage. They are suitable for large-scale storage needs.
When selecting a battery, consider factors such as capacity, depth of discharge, efficiency, and lifespan to ensure it meets your energy storage needs.
Charge Controllers
Charge controllers are essential for regulating the flow of electricity from the solar panels to the batteries, preventing overcharging and extending battery life. There are two main types of charge controllers:
- PWM (Pulse Width Modulation) Controllers: These are simpler and less expensive but less efficient. They are suitable for smaller systems with lead-acid batteries.
- MPPT (Maximum Power Point Tracking) Controllers: These are more advanced and efficient, capable of extracting the maximum power from the solar panels. They are ideal for larger systems and lithium-ion batteries.
Choosing the right charge controller ensures optimal performance and longevity of your battery storage system.
Monitoring and Maintenance
Effective monitoring and maintenance are crucial for the long-term success of your DIY solar power system. Here are some key points to consider:
- Monitoring Systems: Most modern inverters come with monitoring systems that allow you to track the performance of your solar panels in real-time. This can help you identify and address issues promptly.
- Regular Inspections: Periodically inspect your solar panels, inverters, and batteries for any signs of wear, damage, or dirt. Clean the panels as needed to ensure maximum efficiency.
- Battery Maintenance: Follow the manufacturer’s guidelines for maintaining your batteries. This may include checking electrolyte levels for lead-acid batteries or ensuring proper ventilation for lithium-ion batteries.
- Professional Check-ups: Even if you installed the system yourself, consider having a professional inspect it annually to ensure everything is functioning correctly and safely.
By staying proactive with monitoring and maintenance, you can ensure your solar power system operates efficiently and reliably for many years.
Optimizing Your Solar Power System
Maximizing Efficiency
To get the most out of your DIY solar power system, maximizing efficiency is crucial. Here are some strategies to ensure your system operates at peak performance:
- Optimal Panel Placement: Ensure your solar panels are positioned to receive maximum sunlight. In the northern hemisphere, this typically means facing them south at an angle that matches your latitude.
- Regular Cleaning: Dust, dirt, and debris can significantly reduce the efficiency of your solar panels. Clean them regularly to maintain optimal performance.
- Minimize Shading: Even partial shading can drastically reduce the output of your solar panels. Trim nearby trees and avoid placing panels near structures that cast shadows.
- Use High-Quality Components: Invest in high-quality inverters, charge controllers, and batteries. These components play a critical role in the overall efficiency of your system.
- Monitor Performance: Use monitoring systems to track the performance of your solar panels. This can help you identify and address issues promptly.
Seasonal Adjustments
Solar energy production varies with the seasons due to changes in the sun’s position and weather conditions. Here’s how to adjust your system for optimal performance year-round:
- Adjust Tilt Angle: In winter, tilt your panels more vertically to capture the lower sun. In summer, a flatter angle is more effective. Use adjustable mounts if possible.
- Clear Snow and Debris: In winter, snow accumulation can block sunlight. Regularly clear snow and debris to maintain efficiency.
- Monitor Weather Patterns: Be aware of seasonal weather patterns. For instance, if you expect a cloudy season, ensure your battery storage is sufficient to cover periods of low sunlight.
Troubleshooting Common Issues
Even well-maintained systems can encounter issues. Here are some common problems and their solutions:
- Low Power Output: Check for shading, dirty panels, or faulty connections. Ensure your panels are clean and unobstructed.
- Inverter Issues: If your inverter isn’t working, check the connections and ensure it’s properly ventilated. Overheating can cause inverters to shut down.
- Battery Problems: If your batteries aren’t holding charge, they may be old or damaged. Check the voltage and replace if necessary.
- Wiring Issues: Loose or corroded connections can cause power loss. Regularly inspect and tighten connections.
Upgrading and Expanding Your System
As your energy needs grow, you may want to upgrade or expand your solar power system. Here’s how to do it effectively:
- Add More Panels: If you have space, adding more panels can increase your system’s capacity. Ensure your inverter and charge controller can handle the additional load.
- Upgrade Inverters and Batteries: Newer inverters and batteries are often more efficient. Upgrading these components can improve overall system performance.
- Integrate Smart Technology: Use smart inverters and monitoring systems to optimize energy use and track performance in real-time.
- Consider Energy Storage: Adding battery storage can help you store excess energy for use during cloudy days or at night, increasing your system’s reliability.
By following these tips, you can ensure your DIY solar power system operates efficiently and meets your energy needs throughout the year. Regular maintenance, seasonal adjustments, and timely upgrades will keep your system running smoothly and effectively.
Living with Solar Power
Daily Usage Tips
Living with solar power requires a few adjustments to your daily routine to maximize efficiency and ensure you get the most out of your system. Here are some practical tips:
- Monitor Your Consumption: Use energy monitoring tools to track your daily usage and adjust your habits accordingly. This can help you identify peak usage times and shift non-essential activities to periods when solar production is highest.
- Optimize Appliance Use: Run high-energy appliances like dishwashers, washing machines, and dryers during the day when your solar panels are generating the most power.
- Utilize Smart Home Technology: Smart plugs and timers can automate your energy usage, ensuring that devices are only on when needed and during optimal times.
- Maintain Clean Panels: Regularly clean your solar panels to remove dust, leaves, and other debris that can reduce their efficiency.
Long-term Maintenance
Maintaining your solar power system is crucial for its longevity and performance. Here are some key maintenance tasks:
- Regular Inspections: Conduct visual inspections of your panels, inverters, and wiring at least twice a year. Look for any signs of damage or wear.
- Professional Check-ups: Schedule a professional inspection every few years to ensure all components are functioning correctly and safely.
- Battery Maintenance: If you have a battery storage system, check the battery health regularly. Follow the manufacturer’s guidelines for maintenance and replacement.
- Inverter Monitoring: Keep an eye on your inverter’s performance. Most modern inverters come with monitoring apps that can alert you to any issues.
Sustainability and Environmental Impact
One of the most significant benefits of solar power is its positive impact on the environment. Here’s how living with solar power contributes to sustainability:
- Reduction in Carbon Footprint: Solar power is a clean, renewable energy source that significantly reduces greenhouse gas emissions compared to fossil fuels.
- Energy Independence: By generating your own power, you reduce reliance on non-renewable energy sources and contribute to a more sustainable energy grid.
- Resource Conservation: Solar energy reduces the need for water-intensive energy production methods, conserving valuable water resources.
- Promoting Renewable Energy: By adopting solar power, you set an example and encourage others in your community to consider renewable energy options.
Community and Support Networks
Living with solar power can be a community effort. Here’s how you can engage with and benefit from support networks:
- Join Local Solar Groups: Many communities have local solar groups or cooperatives where members share experiences, tips, and resources.
- Online Forums and Communities: Participate in online forums and social media groups dedicated to solar power. These platforms are great for troubleshooting, advice, and staying updated on the latest solar technology.
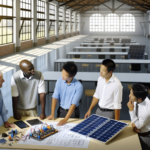
- Educational Workshops: Attend workshops and seminars on solar energy to deepen your understanding and stay informed about new developments.
- Advocacy and Outreach: Get involved in advocacy efforts to promote renewable energy policies and incentives in your area.
By integrating these practices into your daily life, you can ensure that your solar power system remains efficient, sustainable, and beneficial for both you and the environment.
