

Introduction
Why Install Solar Panels?
In recent years, the push towards renewable energy sources has gained significant momentum, and solar energy is at the forefront of this movement. Installing solar panels on your property is not just a trend; it’s a practical step towards energy independence and environmental stewardship. By harnessing the power of the sun, you can generate your own electricity, reduce your reliance on fossil fuels, and contribute to a cleaner, greener planet.
Benefits of Solar Energy
The benefits of solar energy are numerous and compelling:
- Cost Savings: One of the most immediate benefits of installing solar panels is the reduction in your electricity bills. Over time, the savings can be substantial, effectively paying for the initial investment in the solar panel system.
- Environmental Impact: Solar energy is a clean, renewable resource. By switching to solar power, you reduce your carbon footprint and help combat climate change.
- Energy Independence: Generating your own electricity means you are less dependent on the grid and less vulnerable to energy price fluctuations.
- Increased Property Value: Homes equipped with solar panel systems often see an increase in property value. Potential buyers recognize the long-term savings and environmental benefits, making your property more attractive on the market.
- Incentives and Rebates: Many governments offer incentives, tax credits, and rebates to encourage the adoption of solar energy. These financial benefits can significantly offset the initial costs of installation.
Overview of the Installation Process
Installing solar panels may seem like a daunting task, but with careful planning and the right tools, it can be a manageable and rewarding DIY project. Here’s a brief overview of the steps involved:
- Planning Your Solar Panel Installation: This involves assessing your energy needs, evaluating your site for solar suitability, choosing the right solar panel system, and understanding local regulations and permits.
- Gathering Necessary Tools and Materials: You’ll need essential tools, components of a solar panel system, and safety equipment to ensure a smooth installation process.
- Step-by-Step Installation Guide: This includes preparing the installation site, mounting the solar panels, wiring them, connecting to the inverter, and finally, connecting to the electrical grid or battery storage.
- Testing and Troubleshooting: After installation, initial system checks are crucial. You’ll also need to be prepared to address common issues and monitor system performance.
- Maintenance and Upkeep: Regular maintenance tasks, seasonal considerations, and knowing when to call a professional are essential for the longevity and efficiency of your solar panel system.
By following this guide, you can successfully install your own solar panels and start enjoying the numerous benefits of solar energy. Whether you’re motivated by cost savings, environmental concerns, or energy independence, solar panels are a smart and sustainable choice for your home.
Planning Your Solar Panel Installation
Assessing Your Energy Needs
Before diving into the installation process, it’s crucial to understand your household’s energy requirements. Start by reviewing your electricity bills from the past year to determine your average monthly and annual energy consumption. This information will help you size your solar panel system appropriately.
Consider using an online solar calculator to get a quick estimate of how many solar panels you’ll need. These tools can provide a rough idea based on your location, roof size, and energy usage. Additionally, think about any future changes in your energy consumption, such as purchasing an electric vehicle or adding new appliances, which may increase your energy needs.
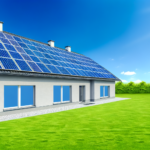
Evaluating Your Site for Solar Suitability
Not every location is ideal for solar panel installation. Conduct a thorough site evaluation to ensure your property is suitable. Key factors to consider include:
- Roof Condition: Ensure your roof is in good condition and can support the weight of solar panels. If your roof needs repairs or replacement, address these issues before installation.
- Roof Orientation and Tilt: South-facing roofs with a tilt angle between 15 to 40 degrees are generally the most efficient for solar energy capture. However, east- and west-facing roofs can also work well.
- Shading: Assess any potential shading from trees, buildings, or other obstructions. Even partial shading can significantly reduce the efficiency of your solar panels.
- Available Space: Ensure you have enough roof space to accommodate the number of panels needed to meet your energy requirements.
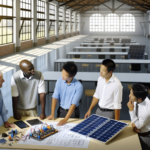
Choosing the Right Solar Panel System
Selecting the appropriate solar panel system involves several considerations:
- Panel Type: There are various types of solar panels, including monocrystalline, polycrystalline, and thin-film. Monocrystalline panels are typically more efficient but also more expensive.
- Inverter Type: Choose between string inverters, microinverters, or power optimizers. Microinverters and power optimizers can offer better performance in partially shaded conditions.
- Efficiency and Durability: Higher efficiency panels generate more electricity but may come at a higher cost. Ensure the panels are durable and can withstand local weather conditions.
- Warranty: Look for panels with a robust warranty, typically around 25 years for product and performance guarantees.
- Cost: Balance your budget with the quality and efficiency of the panels. Remember to factor in potential incentives and rebates.
Understanding Local Regulations and Permits
Navigating local regulations and obtaining the necessary permits is a critical step in the installation process. Here are some key points to consider:
- Building Permits: Check with your local building department to understand the specific permits required for solar panel installation. Requirements can vary significantly by location.
- Incentives and Rebates: Research state and federal incentives, such as the federal solar tax credit and solar renewable energy certificates (SRECs). These can significantly reduce the overall cost of your system.
- Homeowners Association (HOA) Rules: If you live in a community with an HOA, review their guidelines for solar panel installations. Some HOAs have restrictions on the placement and appearance of solar panels.
- Net Metering Policies: Understand your utility’s net metering policies, which allow you to sell excess electricity back to the grid. This can impact the financial viability of your solar investment.
By carefully planning and considering these factors, you’ll be well-prepared to embark on your solar panel installation journey, ensuring a smooth and successful transition to renewable energy.
Gathering Necessary Tools and Materials
Essential Tools for Installation
Before you begin the installation of your solar panel system, it’s crucial to gather all the necessary tools. Having the right tools on hand will make the process smoother and more efficient. Here are some essential tools you will need:
- Drill and Drill Bits: A power drill with various drill bits is essential for creating holes in your roof for mounting brackets and other components.
- Screwdrivers: Both flathead and Phillips screwdrivers will be needed for securing screws and other fasteners.
- Wrench Set: A set of wrenches will be useful for tightening bolts and nuts.
- Wire Strippers: These are necessary for stripping the insulation off electrical wires.
- Tape Measure: Accurate measurements are crucial for proper placement of the solar panels and mounting hardware.
- Chalk Line: This tool helps in marking straight lines on your roof for precise alignment of the mounting system.
- Metal Cutting Saw: A saw will be needed if you need to cut any metal components to size.
- Roof Sealant: To seal any holes or gaps created during the installation process.
Components of a Solar Panel System
A solar panel system is composed of several key components, each playing a vital role in converting sunlight into usable electricity. Here are the main components you will need:
- Solar Panels: These are the primary components that capture sunlight and convert it into electrical energy.
- Mounting Hardware: This includes brackets, rails, and clamps used to secure the solar panels to your roof.
- Inverter: The inverter converts the direct current (DC) electricity generated by the solar panels into alternating current (AC) electricity, which is used by most household appliances.
- Charge Controller: This device regulates the voltage and current coming from the solar panels to the battery, preventing overcharging and prolonging battery life.
- Battery Storage (optional): Batteries store excess energy generated by the solar panels for use during periods of low sunlight or at night.
- Electrical Wiring: Wires and cables are needed to connect all the components of the solar panel system.
- Energy Meter (optional): This device measures the amount of electricity generated by your solar panels and can help you monitor system performance.
Safety Equipment and Precautions
Safety should be your top priority when installing solar panels. Working on a roof and with electrical components can be hazardous. Here are some essential safety equipment and precautions to consider:
- Safety Harness: A safety harness is crucial for preventing falls when working on your roof.
- Hard Hat: Protect your head from potential falling objects or accidental bumps.
- Safety Glasses: Protect your eyes from debris and potential electrical sparks.
- Gloves: Wear gloves to protect your hands from sharp edges and electrical components.
- Non-Slip Footwear: Wear shoes with good traction to prevent slipping on the roof.
- First Aid Kit: Have a first aid kit on hand in case of minor injuries.
- Electrical Safety: Always turn off the main power supply before working with electrical components. If you are unsure about any electrical work, consult a professional electrician.
- Weather Conditions: Avoid installing solar panels during adverse weather conditions such as rain, snow, or high winds.
By gathering all the necessary tools, components, and safety equipment, you will be well-prepared to undertake the installation of your solar panel system. Proper preparation ensures a smoother installation process and helps you avoid potential pitfalls.
Step-by-Step Installation Guide
Preparing the Installation Site
Before you begin installing your solar panels, it’s crucial to prepare the installation site properly. Start by ensuring your roof is in good condition and can support the weight of the solar panels. Clear any debris, leaves, or dirt from the roof surface. If you’re installing a ground-mounted system, make sure the area is level and free of obstructions.
Next, mark the layout of your solar panel array using a chalk line. This will serve as a guide for placing the mounting hardware. Ensure that the layout maximizes sun exposure and avoids shading from nearby trees or structures. Double-check that you have all the necessary permits and that your installation complies with local building codes and regulations.
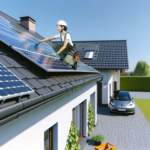
Mounting the Solar Panels
The first step in the actual installation is mounting the racking system, which will hold your solar panels in place. Follow the manufacturer’s instructions for assembling and securing the racking system to your roof or ground mount. Use a drill to create pilot holes and secure the mounts with lag bolts. Make sure to seal any holes with roofing tar or silicone caulk to prevent leaks.
Once the racking system is in place, attach the solar panels using the provided clamps or brackets. Ensure that each panel is securely fastened and aligned correctly. It’s essential to leave enough space between the panels for airflow, which helps in cooling and maintaining efficiency.
Wiring the Solar Panels
After mounting the panels, the next step is wiring them together. Most solar panels come with pre-attached cables and connectors, making this process straightforward. Connect the positive (+) terminal of one panel to the negative (-) terminal of the next panel, creating a series circuit. This configuration increases the voltage output of the array.
Use appropriate wiring and connectors as specified by the manufacturer. Secure the cables to the racking system using zip ties or cable clips to prevent them from moving or getting damaged. Ensure that all connections are tight and weatherproof to avoid any electrical issues.
Connecting to the Inverter
The inverter is a critical component that converts the direct current (DC) generated by the solar panels into alternating current (AC) used by your home. Place the inverter in a location that is easily accessible and well-ventilated. Connect the positive and negative leads from the solar panel array to the corresponding terminals on the inverter.
Follow the manufacturer’s instructions for configuring the inverter settings. Some inverters come with monitoring systems that allow you to track the performance of your solar array. Make sure to ground the inverter properly to ensure safety and compliance with electrical codes.
Connecting to the Electrical Grid or Battery Storage
The final step in the installation process is connecting your solar system to the electrical grid or a battery storage system. If you’re connecting to the grid, you’ll need to install a bi-directional meter that can measure both the electricity you consume and the excess energy you send back to the grid. Contact your utility company to schedule an inspection and grid connection.
For off-grid systems, connect the inverter to your battery storage system. Ensure that the batteries are properly wired and configured to store the excess energy generated by your solar panels. Follow all safety precautions and manufacturer guidelines when handling batteries, as they can be hazardous if not managed correctly.
Once all connections are made, perform a final inspection to ensure everything is secure and functioning correctly. Turn on the system and monitor its performance to ensure it meets your energy needs. Congratulations, you’ve successfully installed your own solar panel system!
Testing and Troubleshooting
Initial System Checks
Once your solar panel system is installed, the first step is to perform initial system checks to ensure everything is functioning correctly. Begin by verifying that all connections are secure and that there are no visible signs of damage or loose wiring.
1. **Visual Inspection**: Check the solar panels, mounting hardware, and wiring for any signs of damage or improper installation. Ensure that all bolts and screws are tightened and that the panels are securely mounted.
2. **Inverter Check**: Turn on the inverter and check its display for any error messages or warnings. The inverter should indicate that it is receiving power from the solar panels and converting it to usable electricity.
3. **Electrical Connections**: Use a multimeter to check the voltage output from the solar panels and ensure it matches the expected values. Verify that the connections to the inverter and the electrical grid or battery storage are correct and secure.
4. **System Activation**: Once all checks are complete, activate the system and monitor it for a few hours to ensure it is generating electricity as expected.
Common Issues and Solutions
Even with careful installation, you may encounter some common issues. Here are a few potential problems and their solutions:
1. **Low Power Output**:
– **Shading**: Ensure that there are no obstructions like trees or buildings casting shadows on the panels.
– **Dirty Panels**: Clean the panels to remove any dirt, dust, or debris that may be blocking sunlight.
– **Faulty Panels**: Check each panel individually to identify any that may be malfunctioning and replace them if necessary.
2. **Inverter Issues**:
– **Error Messages**: Refer to the inverter’s manual to decode any error messages. Common issues include grid connection problems or internal faults.
– **Resetting the Inverter**: Sometimes, simply resetting the inverter can resolve minor issues. Turn it off, wait a few minutes, and then turn it back on.
3. **Wiring Problems**:
– **Loose Connections**: Inspect all wiring connections to ensure they are tight and secure. Loose connections can cause intermittent power issues.
– **Damaged Wires**: Look for any signs of wear or damage to the wiring and replace any compromised sections.
4. **Grid Connection Issues**:
– **Utility Approval**: Ensure that your system has been approved by your utility company and that all necessary permits are in place.
– **Metering Problems**: Verify that the bi-directional meter is functioning correctly and recording both the electricity consumed and generated.
Monitoring System Performance
Ongoing monitoring of your solar panel system is crucial to ensure it continues to operate efficiently. Here are some tips for effective monitoring:
1. **Monitoring Software**: Many solar panel systems come with monitoring software that allows you to track the performance of your system in real-time. Use this software to monitor energy production and identify any drops in performance.
2. **Regular Inspections**: Conduct regular visual inspections of the panels, wiring, and inverter to catch any potential issues early.
3. **Performance Metrics**: Keep an eye on key performance metrics such as daily energy production, peak power output, and system efficiency. Compare these metrics to the expected values to ensure your system is performing optimally.
4. **Professional Maintenance**: Schedule periodic maintenance checks with a professional solar technician to ensure all components are in good working order and to address any issues that may arise.
By following these steps for testing and troubleshooting, you can ensure that your solar panel system operates efficiently and continues to provide clean, renewable energy for years to come.
Maintenance and Upkeep
Regular Maintenance Tasks
Maintaining your solar panel system is crucial to ensure its longevity and optimal performance. Here are some regular maintenance tasks you should perform:
- Cleaning the Panels: Dust, dirt, and debris can accumulate on the surface of your solar panels, reducing their efficiency. Clean the panels at least twice a year using a soft brush or sponge and a gentle, non-abrasive cleanser. Avoid using harsh chemicals or abrasive tools that could damage the panels.
- Inspecting for Damage: Regularly inspect your panels for any signs of physical damage, such as cracks or loose connections. Addressing these issues promptly can prevent further damage and ensure efficient energy production.
- Checking the Inverter: The inverter is a critical component that converts the DC electricity generated by your panels into AC electricity for use in your home. Regularly check the inverter’s status lights and monitor its performance to ensure it is functioning optimally.
- Monitoring System Performance: Use monitoring software provided by your installer to keep an eye on your solar system’s performance. This will help you identify any drop in energy production and troubleshoot potential issues.
Seasonal Considerations
Different seasons bring unique challenges and considerations for maintaining your solar panel system:
- Winter: Snow and ice can accumulate on your panels, blocking sunlight and reducing efficiency. Use a soft brush or a specialized solar panel snow rake to gently remove snow. Avoid using metal tools that could scratch the panels.
- Spring: Spring is an excellent time for a thorough inspection and cleaning. Check for any damage caused by winter weather and ensure that all connections are secure.
- Summer: High temperatures can affect the efficiency of your solar panels. Ensure that your panels are well-ventilated and not obstructed by debris. Also, check for any signs of overheating in the inverter.
- Fall: Falling leaves can accumulate on your panels and block sunlight. Regularly clear leaves and other debris to maintain optimal performance. This is also a good time to inspect your system before winter sets in.
When to Call a Professional
While regular maintenance tasks can be performed by most homeowners, there are situations where professional assistance is necessary:
- Electrical Issues: If you notice any electrical issues, such as frequent inverter shutdowns or irregular performance, it’s best to call a professional. Electrical problems can be complex and dangerous to handle without proper expertise.
- Physical Damage: Significant physical damage, such as cracked panels or damaged mounting structures, should be assessed and repaired by a professional to ensure safety and proper functioning.
- System Upgrades: If you’re considering upgrading your system, such as adding more panels or integrating battery storage, consult a professional to ensure compatibility and optimal performance.
- Annual Inspection: Even if everything seems to be working fine, it’s a good idea to have a professional perform an annual inspection. They can identify potential issues that may not be apparent to the untrained eye and ensure that your system is operating at peak efficiency.
By following these maintenance and upkeep guidelines, you can ensure that your solar panel system continues to provide clean and sustainable energy for years to come. Regular maintenance not only maximizes efficiency but also extends the lifespan of your investment, making it a worthwhile endeavor.
Conclusion
Recap of Key Points
As we conclude this comprehensive guide on installing your own solar panels, let’s recap the key points covered. We began with an introduction to the benefits of solar energy, including cost savings, environmental impact, and energy independence. We then moved on to the planning phase, emphasizing the importance of assessing your energy needs, evaluating your site for solar suitability, and understanding local regulations and permits.
Next, we discussed gathering the necessary tools and materials, highlighting essential tools, components of a solar panel system, and safety equipment. The step-by-step installation guide provided detailed instructions on preparing the installation site, mounting the solar panels, wiring them, connecting to the inverter, and finally, connecting to the electrical grid or battery storage.
We also covered testing and troubleshooting, focusing on initial system checks, common issues and solutions, and monitoring system performance. The maintenance and upkeep section outlined regular maintenance tasks, seasonal considerations, and when to call a professional.
Encouragement for DIY Enthusiasts
Installing your own solar panels can be a highly rewarding endeavor. Not only do you gain the satisfaction of completing a complex project, but you also contribute to a more sustainable future. While the process may seem daunting at first, breaking it down into manageable steps makes it achievable for most DIY enthusiasts. Remember, meticulous planning and adherence to safety protocols are crucial for a successful installation.
If you encounter challenges along the way, don’t be discouraged. Many resources are available to help you, from online forums and instructional videos to professional consultations. The skills and knowledge you gain from this project can be invaluable, not just for maintaining your solar system but for other home improvement projects as well.
Additional Resources and Further Reading
For those looking to delve deeper into the world of solar energy and DIY installations, here are some additional resources and further reading materials:
- Homeowner’s Guide to Going Solar – U.S. Department of Energy
- Solar Power World – Industry news and technical articles
- Solar Reviews – Reviews and comparisons of solar products and installers
- North American Board of Certified Energy Practitioners (NABCEP) – Certification and training resources
- Solar Power World YouTube Channel – Video tutorials and industry insights
By leveraging these resources, you can stay updated on the latest advancements in solar technology, gain insights from industry experts, and find answers to any questions you may have during your installation process.
In conclusion, installing your own solar panels is a significant step towards energy independence and environmental stewardship. With careful planning, the right tools, and a bit of perseverance, you can successfully harness the power of the sun to meet your energy needs. Happy installing!
