

Introduction to DIY Solar Power
Why Choose Solar Power?
Solar power is an increasingly popular choice for homeowners looking to reduce their energy bills and minimize their environmental footprint. By harnessing the energy of the sun, you can generate clean, renewable electricity for your home. This not only helps to reduce greenhouse gas emissions but also provides a sustainable energy solution that can save you money in the long run. Additionally, with advancements in solar technology and decreasing costs, solar power has become more accessible than ever before.
Benefits of DIY Solar Projects
Embarking on a DIY solar project offers several advantages:
- Cost Savings: By installing your own solar system, you can save hundreds or even thousands of dollars on installation fees charged by professional solar companies.
- Customization: DIY projects allow you to tailor the solar setup to your specific energy needs and preferences, ensuring you get exactly what you want.
- Knowledge and Empowerment: Learning about solar energy and how to install a system can be an empowering experience. It equips you with valuable skills and knowledge that can be applied to future projects.
- Independence: A DIY solar system can help you achieve greater energy independence, reducing your reliance on the grid and providing a sense of self-sufficiency.
Understanding Solar Energy Basics
Before diving into a DIY solar project, it’s essential to understand the basics of solar energy. Solar power systems convert sunlight into electricity using photovoltaic (PV) panels. These panels are made up of solar cells that absorb sunlight and generate direct current (DC) electricity. This DC electricity is then converted into alternating current (AC) electricity by an inverter, making it suitable for use in your home.
There are two main types of solar power systems: grid-tied and off-grid. A grid-tied system is connected to the utility grid, allowing you to draw power from the grid when your solar panels aren’t producing enough electricity and to sell excess power back to the grid through net metering. An off-grid system, on the other hand, is completely independent of the utility grid and typically requires battery storage to ensure a continuous power supply.
Understanding these fundamentals will help you make informed decisions as you plan and design your DIY solar system. With the right knowledge and preparation, you can successfully harness the power of the sun to meet your energy needs.
Assessing Your Solar Needs
Evaluating Your Energy Consumption
Before diving into a DIY solar project, it’s crucial to understand your current energy consumption. This step will help you determine the size and capacity of the solar system you need. Start by reviewing your electricity bills over the past year to get an average monthly and annual energy usage in kilowatt-hours (kWh). Pay attention to seasonal variations, as energy consumption can fluctuate with heating and cooling needs.
To get a more detailed understanding, consider using an energy monitor to track the power usage of individual appliances and devices. This can help you identify energy hogs and opportunities for conservation. Additionally, make a list of all the electrical devices you plan to power with your solar system, including their wattage and estimated usage hours per day.
Determining the Right Solar Setup for You
Once you have a clear picture of your energy consumption, the next step is to determine the right solar setup for your needs. There are several factors to consider:
- System Size: Based on your energy consumption, calculate the total capacity of the solar panels required. For instance, if your average monthly usage is 900 kWh, and you receive an average of 5 peak sunlight hours per day, you would need a system that generates about 6 kW (900 kWh / 30 days / 5 hours).
- Type of Panels: Choose between monocrystalline, polycrystalline, or thin-film solar panels. Monocrystalline panels are more efficient but costlier, while polycrystalline panels are less efficient but more affordable. Thin-film panels are less common for residential use due to their lower efficiency.
- Grid-Tied vs. Off-Grid: Decide whether you want a grid-tied system, which allows you to sell excess power back to the utility company, or an off-grid system, which requires battery storage for energy independence.
- Location and Space: Assess the available space on your roof or property for installing solar panels. Ensure the location receives ample sunlight and is free from obstructions like trees or buildings.
Budgeting for Your Solar Project
Budgeting is a critical aspect of any DIY solar project. The cost of a solar system can vary widely based on the size, type of panels, and additional components like inverters and batteries. Here are some key considerations:
- Initial Costs: Calculate the upfront costs of purchasing solar panels, inverters, mounting hardware, and other necessary equipment. Don’t forget to include installation tools and safety gear if you plan to do it yourself.
- Permits and Inspections: Check local regulations and factor in the cost of permits and inspections required for solar installations. Some areas may offer incentives or rebates that can offset these costs.
- Labor Costs: If you decide to hire professionals for part or all of the installation, include labor costs in your budget. While DIY can save money, professional installation ensures compliance with local codes and safety standards.
- Maintenance and Upgrades: Plan for ongoing maintenance costs, such as cleaning and potential repairs. Additionally, consider future upgrades, like adding more panels or battery storage, and how they might impact your budget.
By carefully evaluating your energy consumption, determining the right solar setup, and budgeting appropriately, you can set the foundation for a successful DIY solar project. This preparation will help ensure that your system meets your energy needs and provides a good return on investment.
Components of a DIY Solar System
Solar Panels
Solar panels are the heart of any solar power system. They convert sunlight into electricity through photovoltaic cells. There are three main types of solar panels:
- Monocrystalline: These panels are made from a single crystal of silicon, making them more efficient (17%-22%) but also more expensive. They are ideal for those who want the highest efficiency and have a higher budget.
- Polycrystalline: Made from multiple silicon crystals, these panels are slightly less efficient (15%-17%) but more affordable. They are commonly used in residential installations.
- Thin Film: These panels are made by depositing a thin layer of photovoltaic material onto a surface. They are less efficient (10%-13%) but can generate electricity in low-light conditions. They are typically used in large-scale industrial applications.
Inverters
Inverters are crucial for converting the direct current (DC) produced by solar panels into alternating current (AC), which is used by most household appliances. There are two main types of inverters:
- String Inverters: These are the most common and are used for converting the DC from a series of solar panels into AC. They are cost-effective but can be less efficient if one panel underperforms.
- Microinverters: These are installed on each solar panel, allowing for individual optimization. They are more expensive but offer higher efficiency and better performance monitoring.
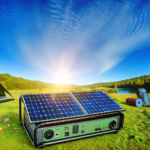
Batteries and Storage Solutions
Batteries store the electricity generated by your solar panels for use when the sun isn’t shining. The main types of batteries used in solar systems are:
- Lead-Acid: These are the most affordable but have a shorter lifespan and lower efficiency compared to other types.
- Gel: A type of lead-acid battery that is more durable and requires less maintenance.
- Lithium-Ion: These are the most efficient and have a longer lifespan but are also the most expensive. They are ideal for those who want the best performance and are willing to invest more upfront.
Charge Controllers
Charge controllers regulate the voltage and current coming from the solar panels to the batteries. They prevent overcharging and over-discharging, which can significantly reduce battery life. There are two main types of charge controllers:
- PWM (Pulse Width Modulation): These are simpler and less expensive but less efficient.
- MPPT (Maximum Power Point Tracking): These are more efficient and can extract more power from the solar panels, but they are also more expensive.
Mounting and Racking Systems
Mounting and racking systems are essential for securely attaching your solar panels to your roof or ground. They ensure that your panels are positioned at the optimal angle to capture the most sunlight. There are several types of mounting systems:
- Roof Mounts: These are the most common and are used to attach panels directly to your roof. They can be either fixed or adjustable to optimize the angle of the panels.
- Ground Mounts: These are used when roof space is limited or not suitable. They offer more flexibility in positioning and can be easier to install and maintain.
- Pole Mounts: These are used for smaller installations and can be adjusted to follow the sun’s path, maximizing efficiency.
Understanding these components is crucial for designing and installing an efficient and effective DIY solar power system. Each component plays a vital role in ensuring that your system operates smoothly and meets your energy needs.
Planning and Designing Your Solar System
Site Assessment and Sunlight Analysis
Before diving into the technical aspects of your DIY solar project, it’s crucial to conduct a thorough site assessment and sunlight analysis. This step ensures that your solar panels will receive optimal sunlight throughout the year, maximizing energy production.
1. **Location and Orientation**: Identify the best location for your solar panels. Typically, a south-facing roof or open ground area is ideal in the Northern Hemisphere. Ensure there are no obstructions like trees, buildings, or other structures that could cast shadows on your panels.
2. **Sunlight Hours**: Use tools like solar pathfinders or online solar calculators to determine the average sunlight hours your location receives daily. This information is vital for estimating the energy your system can generate.
3. **Roof Condition**: If you plan to install panels on your roof, inspect its condition. Ensure it can support the additional weight of the solar panels and that it’s free from damage or the need for repairs.
System Sizing and Configuration
Once you have a clear understanding of your site’s solar potential, the next step is to size and configure your solar system. This involves determining the number of panels you need and how they will be arranged.
1. **Energy Needs Assessment**: Calculate your household’s energy consumption by reviewing your electricity bills over the past year. Look for the total kilowatt-hours (kWh) used each month to get an average monthly and annual consumption.
2. **System Size Calculation**: Based on your energy needs and the average sunlight hours, calculate the size of the solar system required. For instance, if your home uses 900 kWh per month and you receive an average of 5 sunlight hours per day, you would need a system that generates approximately 6 kW (900 kWh / 30 days / 5 hours).
3. **Panel Selection**: Choose the type and number of solar panels. Panels come in various wattages, typically ranging from 250W to 400W. For a 6 kW system, you would need around 15 to 24 panels, depending on the wattage of each panel.
4. **Inverter and Battery Configuration**: Decide on the type of inverter (string, micro, or hybrid) and whether you need battery storage. Batteries are essential if you want to store excess energy for use during non-sunny periods or power outages.
Creating a Wiring Diagram
A wiring diagram is a crucial part of the planning process, providing a visual representation of how all components of your solar system will be connected.
1. **Component Layout**: Start by sketching the layout of your solar panels, inverter, batteries (if any), charge controller, and other components. Indicate the physical locations and how they will be connected.
2. **Electrical Connections**: Detail the wiring connections between the solar panels, inverter, and your home’s electrical system. Ensure you include safety components like fuses, breakers, and disconnect switches.
3. **Compliance and Safety**: Make sure your wiring diagram complies with local electrical codes and standards. This may involve consulting with a certified electrician or using online resources to ensure your design is safe and legal.
4. **Documentation**: Keep a copy of your wiring diagram and all related documentation. This will be useful for future maintenance, troubleshooting, and any necessary inspections.
By carefully planning and designing your solar system, you set the foundation for a successful DIY solar project. Proper site assessment, accurate system sizing, and a detailed wiring diagram are essential steps that ensure your solar installation will be efficient, safe, and effective.
Installation Process
Safety Precautions
Before diving into the installation process, it is crucial to prioritize safety. Working with electrical components and climbing onto roofs can be hazardous. Here are some essential safety tips:
- Wear Protective Gear: Always wear gloves, safety glasses, and non-slip shoes.
- Turn Off Power: Ensure that all power sources are turned off before starting the installation.
- Use Proper Tools: Use insulated tools to prevent electrical shocks.
- Secure Ladders: Make sure ladders are stable and secure before climbing.
- Work with a Partner: Having someone assist you can enhance safety and efficiency.
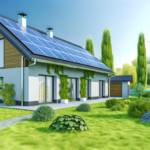
Mounting the Solar Panels
Mounting the solar panels is a critical step that requires precision and care. Here’s how to do it:
- Choose the Mounting Location: Select a location with maximum sunlight exposure, typically a south-facing roof or a ground-mounted system.
- Install the Mounting Brackets: Secure the mounting brackets to the roof or ground using appropriate hardware. Ensure they are aligned and level.
- Attach the Rails: Fix the rails to the mounting brackets. These rails will hold the solar panels in place.
- Secure the Panels: Place the solar panels onto the rails and secure them using clamps or bolts. Double-check that they are firmly attached and properly aligned.
Connecting the Components
Once the panels are mounted, the next step is to connect all the components of your solar system. Follow these steps:
- Connect the Panels: Use appropriate wiring to connect the solar panels in series or parallel, depending on your system design.
- Install the Inverter: Mount the inverter close to the panels but in a shaded area to prevent overheating. Connect the solar panel output to the inverter input.
- Connect the Charge Controller: If you have a battery storage system, connect the solar panels to the charge controller, and then connect the charge controller to the batteries.
- Wire the Batteries: Connect the batteries in series or parallel as required, and then connect them to the inverter.
- Ground the System: Ensure all components are properly grounded to prevent electrical hazards.
System Testing and Troubleshooting
After connecting all components, it’s time to test the system to ensure everything is working correctly. Here’s how:
- Initial Inspection: Double-check all connections and ensure there are no loose wires or exposed conductors.
- Power On: Turn on the inverter and other components. Monitor the system to ensure it starts up correctly.
- Check Output: Use a multimeter to check the voltage and current output from the solar panels and batteries. Ensure they match the expected values.
- Monitor Performance: Observe the system for a few days to ensure it operates smoothly. Look for any irregularities or performance issues.
- Troubleshoot Issues: If you encounter any problems, refer to the component manuals for troubleshooting tips. Common issues include loose connections, faulty wiring, or incorrect settings on the inverter or charge controller.
By following these steps, you can successfully install your DIY solar system and start enjoying the benefits of renewable energy. Always remember to prioritize safety and consult professional help if needed.
Maintenance and Troubleshooting
Regular Maintenance Tips
Maintaining your DIY solar system is crucial for ensuring its longevity and optimal performance. Here are some regular maintenance tips to keep your system running smoothly:
- Clean the Solar Panels: Dust, dirt, and debris can accumulate on your solar panels, reducing their efficiency. Clean the panels with water and a soft brush or cloth every few months, or more frequently if you live in a dusty area.
- Inspect for Damage: Regularly check your solar panels, wiring, and mounting systems for any signs of damage or wear. Look for cracks in the panels, loose connections, or corrosion on the mounts.
- Monitor Performance: Use a monitoring system to keep track of your solar power production. Sudden drops in performance can indicate issues that need addressing.
- Check Inverter Status: The inverter is a critical component of your solar system. Ensure that it is functioning correctly by checking the display for any error messages or warning lights.
- Trim Nearby Vegetation: Ensure that trees or other vegetation do not cast shadows on your solar panels, as shading can significantly reduce their efficiency.
Common Issues and Solutions
Even with regular maintenance, you may encounter some common issues with your DIY solar system. Here are a few problems and their potential solutions:
- Reduced Power Output: If you notice a drop in power output, check for dirty panels, shading, or faulty connections. Cleaning the panels and ensuring all connections are secure can often resolve this issue.
- Inverter Issues: If your inverter is not working correctly, check the manufacturer’s manual for troubleshooting steps. Common fixes include resetting the inverter or checking for loose connections.
- Battery Problems: If you are using a battery storage system, ensure that the batteries are properly maintained and charged. Check for any signs of corrosion or damage and replace batteries as needed.
- System Shutdowns: If your system shuts down unexpectedly, it could be due to an overload or a fault in the wiring. Inspect the wiring for any signs of damage and ensure that your system is not overloaded.
Upgrading Your System
As your energy needs change or as technology advances, you may want to upgrade your DIY solar system. Here are some tips for making effective upgrades:
- Add More Panels: If you need more power, consider adding additional solar panels to your system. Ensure that your inverter and other components can handle the increased load.
- Upgrade the Inverter: Newer inverters may offer better efficiency and additional features such as improved monitoring capabilities. Upgrading your inverter can enhance your system’s performance.
- Enhance Battery Storage: If you find that your current battery storage is insufficient, consider upgrading to higher-capacity batteries or adding more batteries to your system.
- Implement Smart Technology: Integrate smart technology to monitor and control your solar system more effectively. Smart inverters and monitoring systems can provide real-time data and alerts, helping you optimize performance.
By following these maintenance tips, addressing common issues promptly, and considering upgrades when necessary, you can ensure that your DIY solar system remains efficient and reliable for years to come.
Maximizing Efficiency and Performance
Monitoring Your Solar System
To ensure your DIY solar system operates at peak efficiency, continuous monitoring is essential. **Monitoring** allows you to track the performance of your solar panels and identify any issues early on. Here are some key points to consider:
- Install a Monitoring System: Many solar inverters come with built-in monitoring capabilities. These systems can provide real-time data on energy production, system performance, and potential issues.
- Use Monitoring Software: There are various software options available that can help you keep an eye on your solar system. These tools often offer mobile apps, making it easy to check your system’s status from anywhere.
- Regularly Check Performance Metrics: Keep an eye on metrics such as energy output, efficiency rates, and any error messages. Regular checks can help you spot trends and address issues before they become significant problems.
Seasonal Adjustments
The performance of your solar panels can vary with the seasons due to changes in sunlight intensity and duration. Making **seasonal adjustments** can help you maximize energy production throughout the year.
- Adjust the Tilt Angle: The angle of your solar panels should be adjusted to capture the maximum amount of sunlight. In the summer, a lower tilt angle is often more effective, while a steeper angle is better in the winter.
- Clear Snow and Debris: In winter, snow accumulation can block sunlight. Regularly clear snow and any debris from your panels to maintain efficiency.
- Trim Overhanging Branches: As trees grow, they can cast shadows on your panels. Trim any overhanging branches to ensure your panels receive unobstructed sunlight.
Energy Conservation Tips
Maximizing the efficiency of your solar system isn’t just about the panels themselves; it’s also about how you use the energy they produce. Implementing **energy conservation** strategies can help you get the most out of your solar investment.
- Use Energy-Efficient Appliances: Replace old appliances with energy-efficient models. Look for appliances with the ENERGY STAR label, which are designed to use less energy.
- Implement Smart Home Technology: Smart thermostats, lighting, and power strips can help you manage your energy use more effectively. These devices can be programmed to reduce energy consumption during peak hours.
- Practice Good Energy Habits: Simple habits like turning off lights when not in use, unplugging devices, and using natural light can significantly reduce your energy consumption.
- Optimize Heating and Cooling: Proper insulation, weather stripping, and using ceiling fans can reduce the load on your heating and cooling systems, making your home more energy-efficient.
By monitoring your solar system, making seasonal adjustments, and adopting energy conservation practices, you can ensure that your DIY solar project delivers maximum efficiency and performance year-round.

