Introduction to DIY Solar Power
Why Choose Solar Power?
Solar power is an increasingly popular choice for homeowners and businesses alike. The primary reason many people opt for solar energy is to save money. By generating your own electricity, you can significantly reduce or even eliminate your monthly utility bills. Additionally, solar power is a clean and renewable energy source, which means it helps reduce your carbon footprint and contributes to a more sustainable future.
Another compelling reason to choose solar power is energy independence. By producing your own electricity, you become less reliant on the grid, which can be particularly beneficial in areas prone to power outages. Moreover, with advancements in solar technology and decreasing costs, solar power has become more accessible and affordable than ever before.
Benefits of DIY Solar Projects
Taking on a DIY solar project offers several unique advantages:
- Cost Savings: One of the most significant benefits of DIY solar projects is the potential for cost savings. By installing the system yourself, you can save thousands of dollars in labor costs.
- Customization: DIY projects allow you to customize your solar power system to meet your specific energy needs and preferences.
- Learning Experience: Installing your own solar power system can be a rewarding educational experience. You’ll gain valuable knowledge about solar technology, electrical systems, and energy management.
- Satisfaction: Completing a DIY solar project can provide a great sense of accomplishment and pride in your ability to contribute to a more sustainable future.
However, it’s essential to weigh these benefits against the potential challenges, such as the time and effort required, the need for technical skills, and the risk of voiding warranties or encountering installation issues.
Understanding Solar Energy Basics
Before diving into a DIY solar project, it’s crucial to understand the basics of solar energy. Solar power systems convert sunlight into electricity using photovoltaic (PV) cells. These cells are typically made of silicon and are arranged in solar panels. When sunlight hits the PV cells, it excites electrons, creating an electric current.
A standard solar power system consists of several key components:
- Solar Panels: These are the primary components that capture sunlight and convert it into direct current (DC) electricity.
- Inverter: The inverter converts the DC electricity generated by the solar panels into alternating current (AC) electricity, which is used by most household appliances.
- Batteries: In some systems, batteries are used to store excess electricity generated during the day for use at night or during cloudy periods.
- Charge Controller: This device regulates the voltage and current coming from the solar panels to prevent overcharging the batteries.
- Mounting and Racking Systems: These are used to securely attach the solar panels to your roof or another structure.
Understanding these components and how they work together is essential for planning and executing a successful DIY solar project. With this foundational knowledge, you’ll be better equipped to assess your energy needs, choose the right equipment, and ensure a safe and efficient installation.
Planning Your DIY Solar Project
Assessing Your Energy Needs
Before diving into a DIY solar project, it’s crucial to understand your current energy consumption. This ensures you purchase the right number of solar panels and avoid overspending or underpowering your system.
1. **Gather Utility Bills**: Collect your utility bills for the past 12 months to get a clear picture of your monthly and yearly energy consumption. Look for the total kilowatt-hours (kWh) used each month.
2. **Calculate Average Monthly Usage**: Add up the total kWh for the last 12 months and divide by 12 to find your average monthly energy usage.
3. **Consider Seasonal Variation**: Note any significant seasonal variations in your energy consumption. This helps in sizing your solar system to meet peak demands.
4. **Factor in Future Changes**: Consider any anticipated changes in your energy consumption, such as adding new appliances or an electric vehicle.
5. **Determine Solar System Efficiency**: Solar panels are rated by their capacity to generate electricity, typically measured in watts (W) or kilowatts (kW). Higher-efficiency panels produce more electricity in the same amount of space.
6. **Calculate Daily Solar Energy Production**: Use an online solar calculator or map to estimate the daily solar energy production in your location.
7. **Determine System Size**: Calculate the size of the solar system needed to meet your energy requirements by dividing your average monthly usage by the average daily solar energy production.
8. **Consider Panel Degradation and Losses**: Account for potential losses from panel degradation, inverter efficiency, and shading. Adjust your system size to accommodate these losses.
Choosing the Right Location
Selecting the optimal location for your solar panels is essential for maximizing efficiency and performance.
1. **Perform a Shading Analysis**: Identify potential sources of shading that may affect solar panel performance using tools like a Solar Pathfinder or online shading calculators. Plan your project to avoid obstructions or consider a ground-mounted system if necessary.
2. **Assess Roof Condition**: Inspect your roof for signs of damage or deterioration that need repair before installation. Consider the age and remaining lifespan of your roof.
3. **Set Solar Panel Orientation**: Determine the optimal orientation and tilt for solar panels. Aim for a south-facing orientation in the Northern Hemisphere to capture the most sunlight.
Budgeting and Cost Considerations
A thorough financial analysis is crucial for a successful DIY solar project.
1. **Determine Initial Costs**: List all costs associated with your solar installation, including solar panels, inverters, mounting systems, wiring, permits, and any additional construction or reinforcement costs.
2. **Research Incentives and Rebates**: Explore available incentives and rebates at local, state, and federal levels. Common incentives include federal tax credits, grants, rebates, and Renewable Energy Certificates (RECs). For grid-tied systems, explore net metering opportunities.
3. **Estimate Energy Savings**: Calculate the expected energy savings over the system’s lifespan, typically 25-30 years.
4. **Calculate Return on Investment (ROI)**: Use the formula ROI = (Net Return on Investment / Cost of Investment) × 100 to determine the ROI for your solar project.
5. **Evaluate Payback Period**: Calculate the time it takes for the energy savings and incentives to cover the initial investment.
6. **Consider Financing Options**: Determine the impact of financing on your overall financial analysis.
7. **Factor in Maintenance Costs**: Consider potential costs for cleaning, inspections, and occasional repairs.
8. **Compare Financial Scenarios**: Run sensitivity analyses to understand the impact of varying factors on your financial outcomes.
Permits and Regulations
Navigating through local regulations and obtaining necessary permits is a critical step in your DIY solar project.
1. **Research Local Regulations**: Contact your local building department or municipality to inquire about their requirements and regulations for solar installations. Understand zoning laws, setback requirements, and other relevant guidelines.
2. **Submit Permit Applications**: Submit all necessary documentation for permit applications, which may include site plans, system design and specifications, structural details, and electrical diagrams.
3. **Keep Documentation**: Store copies of approved plans, permits, and inspection reports. This documentation is valuable for realtors, potential buyers, and lenders if you decide to sell your property.
By carefully planning and considering these factors, you can ensure a successful and efficient DIY solar installation.
Components of a Solar Power System
Solar Panels
Solar panels are the heart of any solar power system. They capture sunlight and convert it into direct current (DC) electricity. Panels are typically made from silicon cells, which are known for their efficiency and durability. When choosing solar panels, consider factors such as efficiency, wattage, and warranty. Higher efficiency panels may cost more upfront but can generate more electricity in a smaller space, making them ideal for limited roof areas.
Inverters
Inverters play a crucial role in a solar power system by converting the DC electricity generated by the solar panels into alternating current (AC) electricity, which is used by most household appliances. There are two main types of inverters: string inverters and microinverters. String inverters are cost-effective and suitable for installations with minimal shading, while microinverters are more expensive but offer better performance in shaded conditions and allow for panel-level monitoring.
Batteries and Storage Solutions
Batteries store excess electricity generated by your solar panels for use when the sun isn’t shining, such as during the night or on cloudy days. This is especially important for off-grid systems or for those who want backup power during grid outages. Lithium-ion batteries are the most popular choice due to their high energy density, long lifespan, and decreasing costs. When selecting a battery, consider its capacity (measured in kilowatt-hours), depth of discharge, and cycle life.
Charge Controllers
Charge controllers are essential for systems that include battery storage. They regulate the voltage and current coming from the solar panels to the batteries, preventing overcharging and extending battery life. There are two main types of charge controllers: Pulse Width Modulation (PWM) and Maximum Power Point Tracking (MPPT). MPPT controllers are more efficient and can extract more power from the solar panels, especially in varying weather conditions.
Mounting and Racking Systems
Mounting and racking systems secure your solar panels to your roof or ground. These systems must be durable and able to withstand harsh weather conditions. Roof-mounted systems are the most common and can be installed on various roof types, including flat, sloped, and metal roofs. Ground-mounted systems are an alternative for properties with ample space and can be easier to install and maintain. When choosing a mounting system, consider factors such as roof type, wind load, and ease of installation.
By understanding these key components, you can make informed decisions when planning and installing your DIY solar power system. Each component plays a vital role in ensuring the efficiency, reliability, and longevity of your solar setup.
Step-by-Step Installation Guide
Preparing the Site
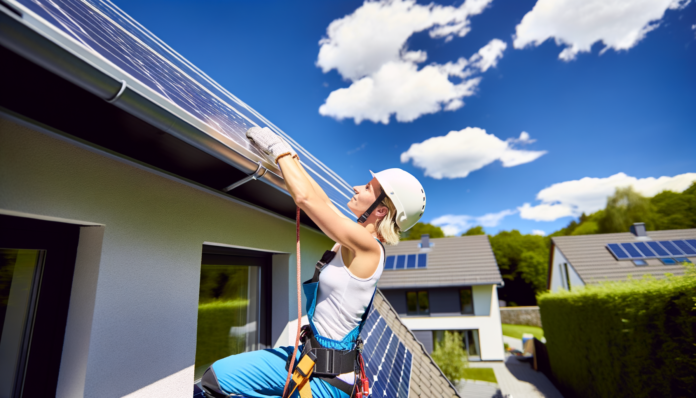
Before you begin installing your solar power system, it’s crucial to prepare the site properly. Start by selecting a location that receives maximum sunlight throughout the day. Clear any obstructions such as trees, debris, or other structures that might cast shadows on your solar panels. Ensure the surface is stable and can support the weight of the panels and mounting equipment. If you’re installing on a roof, check its structural integrity and make any necessary repairs.
Installing Solar Panels
Once the site is prepared, you can begin installing the solar panels. Follow these steps:
1. **Mounting the Panels**: Use the appropriate mounting and racking system for your setup. Roof-mounted systems often use rails and brackets, while ground-mounted systems may require poles or frames.
2. **Securing the Panels**: Attach the solar panels to the mounting system securely. Ensure they are tilted at the optimal angle for your location to maximize sunlight exposure.
3. **Wiring the Panels**: Connect the solar panels in series or parallel, depending on your system design. Use the recommended wire size and connectors to ensure a safe and efficient connection.
Connecting the Inverter
The inverter is a critical component that converts the DC electricity generated by the solar panels into AC electricity for use in your home. Follow these steps to connect the inverter:
1. **Mounting the Inverter**: Install the inverter in a cool, dry, and well-ventilated area. Avoid direct sunlight and extreme temperatures.
2. **Connecting to Panels**: Connect the DC input terminals of the inverter to the output wires from the solar panels. Ensure all connections are secure and properly insulated.
3. **Connecting to Electrical System**: Connect the AC output of the inverter to your home’s electrical system. This may involve wiring into your main electrical panel or a dedicated sub-panel.
Setting Up Battery Storage
If your system includes battery storage, follow these steps to set it up:
1. **Choosing a Location**: Place the batteries in a cool, dry, and well-ventilated area. Ensure they are easily accessible for maintenance.
2. **Connecting the Batteries**: Connect the batteries to the charge controller, which regulates the charging and discharging process. Use the appropriate cables and connectors to ensure a safe and efficient connection.
3. **Integrating with Inverter**: Connect the battery bank to the inverter. This allows the stored energy to be converted to AC power when needed.
Final Connections and Testing
With all components installed, it’s time to make the final connections and test the system:
1. **Double-Check Connections**: Ensure all connections are secure and properly insulated. Check for any loose wires or exposed terminals.
2. **Power Up the System**: Turn on the inverter and charge controller. Monitor the system to ensure it starts up correctly and begins generating power.
3. **Testing**: Use a multimeter to check the voltage and current at various points in the system. Verify that the solar panels are producing the expected output and that the inverter is converting it correctly.
4. **Monitoring**: Set up any monitoring systems or apps that came with your equipment. This will help you track the performance and efficiency of your solar power system.
By following these steps, you can successfully install your DIY solar power system and start enjoying the benefits of renewable energy. Always remember to prioritize safety and consult a professional if you encounter any issues beyond your expertise.
Maintenance and Troubleshooting
Routine Maintenance Tips
Maintaining your DIY solar power system is crucial for ensuring its longevity and optimal performance. Here are some routine maintenance tips to keep your system running smoothly:
- Regular Cleaning: Dust, dirt, and debris can accumulate on solar panels, reducing their efficiency. Clean the panels with water and a soft brush or cloth every few months, or more frequently if you live in a dusty area.
- Inspect for Damage: Regularly check for any physical damage to the panels, wiring, and mounting structures. Look for cracks, loose connections, or corrosion.
- Monitor Performance: Use an energy monitoring system to keep track of your solar power production. Sudden drops in performance can indicate issues that need addressing.
- Check Inverter Status: The inverter is a critical component of your solar system. Ensure it is functioning correctly by checking the display for any error messages or warning lights.
- Trim Nearby Vegetation: Ensure that trees or plants do not cast shadows on your panels. Trim any overhanging branches that could obstruct sunlight.
- Seasonal Adjustments: Depending on your mounting system, you may need to adjust the tilt of your panels seasonally to maximize sunlight exposure.
Common Issues and Solutions
Even with regular maintenance, you may encounter some common issues with your solar power system. Here are a few problems and their potential solutions:
- Reduced Power Output: If you notice a significant drop in power output, check for shading, dirt on the panels, or any damage. Clean the panels and ensure there are no obstructions. If the issue persists, inspect the wiring and connections.
- Inverter Issues: If the inverter is not working correctly, check the display for error codes. Refer to the inverter’s manual for troubleshooting steps. Common issues include overheating, which can be resolved by ensuring proper ventilation.
- Battery Problems: For systems with battery storage, issues like reduced storage capacity or failure to charge can occur. Check the battery connections and ensure they are clean and tight. If the battery is old, it may need to be replaced.
- Loose or Corroded Connections: Inspect all electrical connections for signs of corrosion or looseness. Tighten any loose connections and clean any corroded terminals.
- Panel Damage: Physical damage to panels, such as cracks or chips, can reduce efficiency. Damaged panels may need to be replaced to restore full functionality.
When to Call a Professional
While many maintenance tasks can be handled by a DIY enthusiast, some situations require professional intervention:
- Electrical Issues: If you encounter complex electrical problems or are unsure about handling electrical components, it’s best to call a licensed electrician.
- Inverter Replacement: Replacing an inverter can be a complicated task that may require professional expertise to ensure proper installation and configuration.
- Roof Repairs: If your solar panels are mounted on the roof and you notice any structural issues, such as leaks or damage, consult a roofing professional to avoid further complications.
- System Expansion: If you plan to expand your solar power system, a professional can help design and integrate the new components seamlessly.
- Persistent Performance Issues: If you have tried troubleshooting common issues and your system still underperforms, a professional solar technician can diagnose and fix the problem more effectively.
By following these maintenance tips and knowing when to seek professional help, you can ensure that your DIY solar power system remains efficient and reliable for years to come.
Maximizing Efficiency and Performance
Optimizing Panel Placement
The placement of your solar panels is crucial for maximizing their efficiency. Ideally, panels should be installed in a location that receives the most sunlight throughout the day. **South-facing roofs** are generally the best option in the Northern Hemisphere, as they capture the most sunlight. However, the angle of the roof and any potential obstructions like trees or buildings should also be considered.
To determine the optimal placement, you can use tools like solar pathfinders or online solar calculators. These tools help you assess the amount of sunlight your chosen location will receive throughout the year. **Avoid shaded areas** as much as possible, as even a small amount of shade can significantly reduce the efficiency of your solar panels.
Seasonal Adjustments
Solar panels are most effective when they are perpendicular to the sun’s rays. However, the sun’s position in the sky changes with the seasons. To maintain optimal efficiency, you may need to adjust the tilt of your panels periodically.
In the summer, the sun is higher in the sky, so a lower tilt angle is more effective. Conversely, in the winter, the sun is lower, so a steeper angle is better. Some mounting systems allow for easy adjustment of the panel angle, making it simpler to adapt to seasonal changes. **Regularly adjusting the tilt** can help you capture the maximum amount of solar energy year-round.
Monitoring System Performance
Once your solar power system is up and running, it’s essential to monitor its performance to ensure it operates efficiently. Many modern solar systems come with monitoring software that provides real-time data on energy production, system health, and efficiency.
**Key metrics to monitor** include:
– **Energy output:** Compare the actual energy production with the expected output to identify any discrepancies.
– **System health:** Look for alerts or warnings that may indicate issues with the panels, inverters, or other components.
– **Efficiency:** Track the system’s efficiency over time to ensure it remains consistent.
Regular monitoring allows you to identify and address issues promptly, ensuring your system continues to perform at its best.
Upgrading Components
As solar technology advances, newer and more efficient components become available. Upgrading certain parts of your system can significantly improve its overall performance.
**Consider upgrading the following components:**
– **Solar panels:** Newer panels often have higher efficiency ratings, meaning they can produce more energy from the same amount of sunlight.
– **Inverters:** Modern inverters are more efficient and may offer additional features like better monitoring capabilities.
– **Batteries:** If your system includes battery storage, upgrading to newer, higher-capacity batteries can improve your system’s reliability and efficiency.
Regularly reviewing and upgrading your system components can help you take advantage of the latest advancements in solar technology, ensuring your system remains efficient and effective for years to come.
Future Trends in Solar Technology
Emerging Solar Technologies
The field of solar technology is rapidly evolving, with several groundbreaking innovations on the horizon. One of the most promising developments is the advent of *perovskite solar cells*. These cells offer a higher efficiency rate and lower production costs compared to traditional silicon-based cells. Researchers are also exploring *bifacial solar panels*, which can capture sunlight from both sides, thereby increasing energy output.
Another exciting innovation is the development of *solar skins*. These are custom-designed overlays that can be applied to solar panels to make them blend seamlessly with the aesthetics of a building. This technology aims to address one of the common aesthetic concerns associated with solar panel installations.
Additionally, *transparent solar panels* are being developed for use in windows and other glass surfaces. These panels can generate electricity while still allowing light to pass through, making them ideal for urban environments where space is limited.
Integration with Smart Home Systems
As smart home technology becomes more prevalent, the integration of solar power systems with these technologies is a natural progression. Modern solar power systems can now be connected to smart home hubs, allowing homeowners to monitor and control their energy usage in real-time. This integration can optimize energy consumption, reduce waste, and even automate the charging of electric vehicles during peak sunlight hours.
*Smart inverters* are another key component in this integration. These devices not only convert DC power from solar panels into AC power for home use but also communicate with smart home systems to provide detailed analytics and performance data. This allows for more efficient energy management and can help identify potential issues before they become significant problems.
Moreover, advancements in *battery storage technology* are making it easier to store excess solar energy for use during nighttime or cloudy days. These smart batteries can be programmed to release stored energy during peak demand times, reducing reliance on the grid and lowering electricity bills.
The Role of Solar in Sustainable Living
Solar technology is playing an increasingly vital role in promoting sustainable living. As the world grapples with climate change and the need for renewable energy sources, solar power offers a viable solution for reducing carbon footprints. By harnessing the sun’s energy, individuals and communities can significantly decrease their reliance on fossil fuels.
In addition to environmental benefits, solar power can also contribute to *energy independence*. Homeowners with solar installations can generate their own electricity, reducing their vulnerability to grid outages and fluctuating energy prices. This is particularly beneficial in remote or disaster-prone areas where reliable access to electricity is crucial.
Furthermore, the concept of *solar communities* is gaining traction. These are neighborhoods or communities that collectively invest in solar power systems, sharing the generated energy among residents. This not only makes solar power more accessible but also fosters a sense of community and shared responsibility for sustainable living.
In conclusion, the future of solar technology is bright, with numerous innovations and integrations set to enhance its efficiency, accessibility, and role in sustainable living. As these technologies continue to develop, the adoption of solar power is likely to become even more widespread, paving the way for a cleaner, more sustainable future.
