


Introduction
The Growing Appeal of Solar-Powered Workshops
In recent years, the allure of solar-powered workshops has surged, capturing the imagination of DIY enthusiasts, hobbyists, and professionals alike. The idea of harnessing the sun’s energy to power tools, lights, and other equipment is not only environmentally friendly but also economically advantageous. As the cost of solar panels continues to decline and their efficiency improves, more people are considering solar energy as a viable option for their workshops. Whether you’re a woodworker, metalworker, or simply someone who enjoys tinkering with various projects, a solar-powered workshop offers a sustainable and self-sufficient solution that aligns with modern values of green living and energy independence.
Benefits of Solar Energy for Outdoor Enthusiasts and Off-Grid Living
For outdoor enthusiasts and those interested in off-grid living, solar energy presents a multitude of benefits. Here are some key advantages:
- Environmental Impact: Solar energy is a clean, renewable resource that reduces your carbon footprint. Unlike fossil fuels, it doesn’t produce harmful emissions or contribute to climate change.
- Cost Savings: After the initial investment in solar panels and equipment, the ongoing cost of solar energy is minimal. You can significantly reduce or even eliminate your electricity bills.
- Energy Independence: Solar power allows you to be less reliant on the grid, providing a reliable source of energy even in remote locations. This is particularly beneficial for off-grid living and in areas prone to power outages.
- Low Maintenance: Solar panels require minimal maintenance, making them a hassle-free option for long-term energy production.
- Scalability: Solar systems can be easily expanded as your energy needs grow. You can start with a small setup and add more panels and batteries over time.
Purpose and Scope of the Article
The purpose of this article is to provide a comprehensive guide to constructing your own solar-powered workshop, from the initial planning stages to the final installation and maintenance. We will cover the following key areas:
- Planning Your Solar-Powered Workshop: Assessing your energy needs, choosing the right location, designing the layout, and budgeting.
- Selecting Solar Equipment: Understanding the different types of solar panels, inverters, battery storage options, mounting systems, and additional accessories.
- Installation Process: Step-by-step instructions for preparing the site, installing solar panels, connecting inverters and batteries, and ensuring safety.
- Maintenance and Troubleshooting: Regular maintenance tasks, common issues and solutions, seasonal considerations, and when to seek professional help.
- Maximizing Efficiency and Performance: Energy-saving tips, monitoring and managing energy use, and upgrading and expanding your system.
By the end of this article, you will have a clear understanding of how to turn your solar-powered workshop from a blueprint into reality, empowering you to embrace a more sustainable and self-sufficient lifestyle.
Planning Your Solar-Powered Workshop
Assessing Your Energy Needs
Before diving into the construction of your solar-powered workshop, it’s crucial to assess your energy needs. Start by listing all the tools and equipment you plan to use, along with their power ratings. Consider both peak and average usage. For instance, power tools like saws and drills have high power demands but are used intermittently, while lighting and ventilation systems may run continuously.
To get a comprehensive understanding, you can use an energy consumption calculator or consult with a solar energy expert. This step will help you determine the size of the solar system required to meet your energy demands efficiently.
Choosing the Right Location
The location of your workshop plays a significant role in the efficiency of your solar power system. Ideally, you want a spot that receives maximum sunlight throughout the day. Avoid areas shaded by trees, buildings, or other obstructions.
Consider the orientation and tilt of your solar panels. In the Northern Hemisphere, panels should generally face south to capture the most sunlight. The angle of the panels should be adjusted according to your latitude to maximize efficiency. Ground-mounted systems offer flexibility in positioning but require more space, while roof-mounted systems save space but may have limitations based on roof orientation and structure.
Designing the Layout
Designing the layout of your solar-powered workshop involves more than just placing solar panels. Think about the overall workflow and how you will use the space. Ensure that the layout allows for easy access to tools and materials, and consider incorporating storage solutions to keep the workspace organized.
Plan the electrical layout carefully. Position the inverter and battery storage in a location that is easily accessible for maintenance but protected from the elements. Ensure that wiring is done safely and efficiently, minimizing the distance between the solar panels, inverter, and battery storage to reduce energy loss.
Budgeting and Cost Considerations
Budgeting is a critical aspect of planning your solar-powered workshop. Start by estimating the total cost of the project, including solar panels, inverters, batteries, mounting systems, wiring, and installation. Don’t forget to factor in additional costs such as permits, inspections, and potential upgrades to your existing electrical system.
Consider the long-term savings on energy bills and potential incentives or rebates available for solar installations. While the initial investment may be significant, the return on investment can be substantial over time. Additionally, explore financing options such as solar loans or leases to make the project more affordable.
By carefully planning and considering these factors, you can ensure that your solar-powered workshop is both efficient and cost-effective, providing a sustainable and reliable energy source for your projects.
Selecting Solar Equipment
Types of Solar Panels
When selecting solar panels for your workshop, you have several options to consider. The most common types are:
- Monocrystalline Panels: Known for their high efficiency and sleek appearance, these panels are made from a single crystal structure. They are ideal for workshops with limited roof space.
- Polycrystalline Panels: These panels are made from multiple silicon crystals and are generally less expensive but slightly less efficient than monocrystalline panels.
- Thin-Film Panels: Lightweight and flexible, thin-film panels are less efficient but can be a good option for unconventional surfaces or portable setups.
Each type has its pros and cons, so consider your specific needs, budget, and available space when making your choice.
Inverters and Battery Storage Options
Inverters and battery storage are crucial components of your solar-powered workshop. The inverter converts the DC electricity generated by the solar panels into AC electricity, which is used by most tools and appliances.
- String Inverters: These are cost-effective and suitable for installations where all panels receive uniform sunlight.
- Microinverters: Installed on each panel, microinverters optimize the performance of individual panels, making them ideal for areas with shading issues.
- Hybrid Inverters: These inverters can manage both solar panels and battery storage, providing flexibility for future upgrades.
For battery storage, options include:
- Lead-Acid Batteries: Affordable and reliable, but require regular maintenance and have a shorter lifespan.
- Lithium-Ion Batteries: More expensive but offer longer life, higher efficiency, and require less maintenance.
- Repurposed EV Batteries: A cost-effective and sustainable option, though they may require more space and specific installation considerations.
Mounting Systems and Hardware
The mounting system is essential for securing your solar panels. The choice of mounting system depends on your workshop’s location and roof type.
- Roof-Mounted Systems: Ideal for workshops with sufficient roof space and proper orientation. Ensure the roof can support the additional weight.
- Ground-Mounted Systems: Suitable for workshops with ample ground space. These systems are easier to access for maintenance and can be oriented for optimal sunlight exposure.
- Pole-Mounted Systems: Useful for areas with limited roof or ground space. These systems can be adjusted for seasonal changes in sunlight.
Ensure you use high-quality hardware to withstand weather conditions and provide long-term stability.
Additional Accessories and Tools
To complete your solar-powered workshop, consider the following accessories and tools:
- Charge Controllers: Regulate the voltage and current from the solar panels to the batteries, preventing overcharging and extending battery life.
- Monitoring Systems: Track the performance of your solar system in real-time, helping you identify issues and optimize efficiency.
- Safety Equipment: Include circuit breakers, fuses, and grounding equipment to ensure the safety of your installation.
- Wiring and Connectors: Use high-quality, weather-resistant wiring and connectors to ensure reliable and efficient power transmission.
By carefully selecting the right solar equipment, you can ensure that your workshop is efficient, reliable, and tailored to your specific needs.
Installation Process
Preparing the Site
Before you begin installing your solar-powered workshop, it’s crucial to prepare the site properly. Start by clearing the area of any debris, vegetation, or obstacles that could interfere with the installation. Ensure the ground is level and stable, as this will provide a solid foundation for your solar panels and other equipment. If you’re mounting panels on a roof, inspect the roof’s condition to ensure it can support the additional weight. Reinforce the structure if necessary.
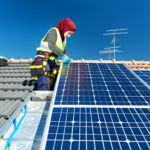
Installing Solar Panels
Once the site is prepared, you can begin installing the solar panels. Follow these steps:
1. **Mounting the Panels**: Choose the appropriate mounting system based on your site conditions. Ground-mounted systems are ideal for open spaces, while roof-mounted systems are suitable for buildings. Secure the mounting brackets to the ground or roof, ensuring they are aligned and level.
2. **Attaching the Panels**: Carefully place the solar panels onto the mounting brackets. Use the provided hardware to secure them in place. Ensure the panels are tilted at the optimal angle to maximize sunlight exposure, typically between 20 to 40 degrees depending on your location.
3. **Wiring the Panels**: Connect the solar panels in series or parallel, depending on your system design. Use weatherproof connectors and cables to ensure a secure and durable connection. Route the cables neatly to avoid any potential damage.
Connecting Inverters and Batteries
With the solar panels in place, the next step is to connect the inverters and batteries:
1. **Installing the Inverter**: The inverter converts the direct current (DC) generated by the solar panels into alternating current (AC) used by most appliances. Mount the inverter close to the solar panels to minimize energy loss. Follow the manufacturer’s instructions for wiring the inverter to the solar panels and the electrical system of your workshop.
2. **Setting Up Battery Storage**: If your system includes battery storage, install the batteries in a well-ventilated, temperature-controlled area. Connect the batteries to the inverter using appropriate cables and connectors. Ensure the battery management system (BMS) is properly configured to monitor and manage the battery’s performance.
Safety Considerations and Best Practices
Safety is paramount when installing a solar-powered workshop. Follow these best practices to ensure a safe and efficient installation:
1. **Electrical Safety**: Always turn off the main power supply before working on the electrical system. Use insulated tools and wear protective gear to prevent electrical shocks.
2. **Structural Safety**: Ensure all mounting systems and brackets are securely fastened to prevent panels from dislodging during high winds or storms. Regularly inspect the installation for any signs of wear or damage.
3. **Fire Safety**: Install appropriate fuses and circuit breakers to protect the system from electrical faults. Keep flammable materials away from the installation site.
4. **Professional Help**: If you’re unsure about any aspect of the installation, seek professional assistance. A certified solar installer can ensure the system is installed correctly and safely.
By following these steps and safety guidelines, you can successfully install a solar-powered workshop that is efficient, reliable, and safe.
Maintenance and Troubleshooting
Regular Maintenance Tasks
Maintaining your solar-powered workshop is crucial to ensure its efficiency and longevity. Here are some regular maintenance tasks you should perform:
- Cleaning Solar Panels: Dust, dirt, and debris can accumulate on your solar panels, reducing their efficiency. Clean them with water and a soft brush or cloth every few months, or more frequently if you live in a dusty area.
- Inspecting Connections: Regularly check all electrical connections, including those between panels, inverters, and batteries, to ensure they are secure and free from corrosion.
- Monitoring System Performance: Use monitoring software to keep an eye on your system’s performance. Look for any significant drops in energy production, which could indicate a problem.
- Checking for Shading: Ensure that no new obstructions, such as growing trees or new buildings, are casting shadows on your panels.
- Battery Maintenance: If you have a battery storage system, check the electrolyte levels (for lead-acid batteries) and ensure the batteries are operating within the recommended temperature range.
Common Issues and Solutions
Even with regular maintenance, you may encounter some common issues. Here are a few and their solutions:
- Tripped Circuit Breakers: If a section of your system stops working, check the circuit breakers. Reset them if necessary, but if the problem persists, you may need to replace a faulty breaker.
- Shading Problems: If shading is reducing your system’s efficiency, consider trimming trees or relocating obstructions. Using micro-inverters can also help mitigate the impact of partial shading.
- Inverter Issues: Inverters can sometimes fail or malfunction. Check the inverter’s display for error messages and consult the manual for troubleshooting steps. If the issue persists, you may need to contact the manufacturer for support or replacement.
- Loose Connections: Regularly inspect and tighten any loose connections to prevent power loss and potential safety hazards.
Seasonal Considerations
Seasonal changes can affect the performance of your solar-powered workshop. Here are some considerations for different seasons:
- Winter: Snow accumulation on panels can significantly reduce energy production. Use a roof rake to clear snow from accessible panels. Additionally, shorter days and lower sun angles mean less overall sunlight, so plan your energy usage accordingly.
- Summer: High temperatures can reduce the efficiency of solar panels. Ensure adequate ventilation around your panels and inverters to prevent overheating.
- Spring and Fall: These seasons often bring increased debris from falling leaves and pollen. Regularly clean your panels to maintain optimal performance.
When to Seek Professional Help
While many maintenance tasks can be performed by the workshop owner, some situations require professional assistance:
- Persistent Performance Issues: If you notice a consistent drop in energy production that you cannot resolve, it’s time to call a professional to diagnose and fix the problem.
- Electrical Problems: Any issues involving electrical components, such as faulty wiring or inverters, should be handled by a licensed electrician to ensure safety and compliance with local codes.
- System Upgrades: If you plan to expand your system or upgrade components, professional installation ensures that the new equipment is integrated correctly and safely.
- Warranty Repairs: If any component of your system is still under warranty, contact the manufacturer or an authorized service provider for repairs to avoid voiding the warranty.
Regular maintenance and timely troubleshooting are essential to keep your solar-powered workshop running efficiently. By staying proactive, you can maximize the lifespan and performance of your solar energy system.
Maximizing Efficiency and Performance
Energy-Saving Tips
To get the most out of your solar-powered workshop, it’s essential to implement energy-saving strategies. Here are some practical tips:
- Insulation: Properly insulate your workshop to reduce the need for heating and cooling. This can significantly lower your energy consumption.
- LED Lighting: Replace traditional incandescent bulbs with LED lights. LEDs are more energy-efficient and have a longer lifespan.
- Energy-Efficient Appliances: Choose appliances with high energy efficiency ratings. Look for the Energy Star label when purchasing new equipment.
- Natural Lighting: Maximize the use of natural light by installing skylights or large windows. This reduces the need for artificial lighting during the day.
- Power Strips: Use smart power strips to prevent phantom loads, which occur when devices consume energy even when turned off.
Monitoring and Managing Energy Use
Effective monitoring and management of your energy use can help you identify inefficiencies and optimize your solar power system’s performance.
- Energy Monitors: Install energy monitors to track your workshop’s energy consumption in real-time. These devices can provide valuable insights into your energy usage patterns.
- Smart Meters: Consider installing smart meters that offer detailed data on energy consumption. This information can help you make informed decisions about energy use.
- Regular Audits: Conduct regular energy audits to identify areas where you can improve efficiency. This can involve checking for leaks, inspecting insulation, and evaluating the performance of your solar panels.
- Adjust Usage: Shift high-energy tasks to times when your solar panels are generating the most power. This can help you make the most of your solar energy and reduce reliance on battery storage or grid power.
Upgrading and Expanding Your System
As your energy needs grow or technology advances, you may find it beneficial to upgrade or expand your solar power system.
- Additional Panels: If your energy consumption increases, consider adding more solar panels to your system. This can help you generate more power and reduce your dependence on external energy sources.
- Battery Storage: Upgrade your battery storage capacity to store more energy for use during cloudy days or at night. Modern batteries are more efficient and have longer lifespans.
- Inverter Upgrades: Invest in a more efficient inverter to convert solar energy into usable electricity more effectively. Newer inverters often come with advanced features like remote monitoring and better energy conversion rates.
- Smart Technology: Integrate smart technology into your system for better control and automation. Smart thermostats, lighting systems, and energy management software can help you optimize energy use and improve overall efficiency.
By implementing these strategies, you can ensure that your solar-powered workshop operates at peak efficiency, providing you with reliable, sustainable energy for all your projects.
Conclusion
Recap of Key Points
As we conclude our journey from blueprint to reality in constructing a solar-powered workshop, let’s revisit the essential steps and considerations. We began by understanding the growing appeal and numerous benefits of solar energy, particularly for outdoor enthusiasts and those living off-grid. We then moved on to the planning phase, where assessing energy needs, choosing the right location, designing the layout, and budgeting were crucial steps. Selecting the appropriate solar equipment, including panels, inverters, batteries, and mounting systems, was our next focus. The installation process followed, emphasizing site preparation, panel installation, and safety considerations. Finally, we discussed maintenance, troubleshooting, and ways to maximize efficiency and performance.
Encouragement for Sustainable Living
Building a solar-powered workshop is more than just a project; it’s a commitment to sustainable living. By harnessing the power of the sun, you are reducing your carbon footprint and contributing to a cleaner, greener planet. This endeavor not only provides you with a self-sufficient workspace but also sets an example for others to follow. Embracing solar energy is a step towards a more sustainable future, where renewable resources play a pivotal role in our daily lives. Your efforts in constructing a solar-powered workshop are a testament to the positive impact individuals can make in the fight against climate change.
Additional Resources and Further Reading
To further your knowledge and assist you in your solar-powered journey, here are some valuable resources:
- Homeowner’s Guide to Going Solar – A comprehensive guide from the U.S. Department of Energy.
- Solar Power World – Industry news, insights, and resources on solar power.
- National Renewable Energy Laboratory (NREL) – Research and data on renewable energy technologies.
- Solar United Neighbors – A community of solar supporters working to help people go solar and fight for their energy rights.
- Build It Solar – DIY solar projects and resources for renewable energy enthusiasts.
By leveraging these resources, you can stay informed about the latest advancements in solar technology, find support for your projects, and continue to advocate for sustainable living. Your solar-powered workshop is just the beginning; the knowledge and experience you gain can inspire further innovations and contributions to a sustainable future.


