Introduction to DIY Solar Power Systems
Why Choose Solar Power?
Solar power has emerged as a leading choice for homeowners looking to reduce their carbon footprint and embrace renewable energy. The push for sustainable living has made solar energy not only an environmentally friendly option but also a financially savvy one. By harnessing the power of the sun, homeowners can significantly cut down on their electricity bills, increase their home’s value, and contribute to a cleaner planet. Solar power systems convert sunlight into electricity, providing a reliable and renewable source of energy that can be used to power homes, appliances, and even electric vehicles.
Benefits of DIY Solar Power Systems
Opting for a DIY solar power system offers several advantages over professionally installed systems. Here are some key benefits:
- Cost Savings: DIY solar installations can reduce costs by up to 50% compared to professional setups. This is primarily due to the elimination of labor costs.
- Customization: DIY enthusiasts have the flexibility to design and install a system that perfectly fits their specific energy needs and home layout.
- Educational Experience: Installing your own solar power system provides a hands-on learning experience about renewable energy and electrical systems.
- Immediate Savings: With solar loans and tax incentives, homeowners can start saving on their energy bills from day one.
- Increased Home Value: Homes with solar power systems often see an increase in property value, making it a worthwhile investment.
Understanding Solar Energy Basics
Before diving into the installation of a DIY solar power system, it’s essential to understand the basics of solar energy. Solar power systems primarily consist of solar panels, inverters, batteries, and mounting systems. Here’s a brief overview:
- Solar Panels: These are the most visible component of a solar power system. They capture sunlight and convert it into direct current (DC) electricity. There are different types of solar panels, including monocrystalline and polycrystalline, each with its own efficiency and cost characteristics.
- Inverters: Solar panels generate DC electricity, but most home appliances run on alternating current (AC). Inverters convert the DC electricity from the panels into AC electricity that can be used in your home.
- Batteries: For those looking to store excess energy for use during cloudy days or at night, batteries are an essential component. They store the electricity generated by the solar panels for later use.
- Mounting Systems: These are used to secure the solar panels to your roof or ground. Proper mounting ensures that the panels are positioned to capture the maximum amount of sunlight.
Understanding these components and how they work together is crucial for anyone considering a DIY solar power system. With the right knowledge and tools, homeowners can successfully install their own solar power systems, leading to long-term savings and a more sustainable lifestyle.
Planning Your DIY Solar Power System
Assessing Your Energy Needs
Before diving into the installation of a DIY solar power system, it’s crucial to understand your household’s energy consumption. Start by reviewing your electricity bills to determine your average monthly and annual energy usage, typically measured in kilowatt-hours (kWh). Identify the appliances and devices that consume the most energy and consider any future changes in your energy needs, such as the addition of electric vehicles or new appliances. This assessment will help you size your solar power system accurately, ensuring it meets your energy demands.
Evaluating Your Location and Sunlight Exposure
The efficiency of your solar power system heavily depends on your location and the amount of sunlight your property receives. Use tools like solar maps or online calculators to estimate the solar potential of your area. Consider factors such as the orientation and tilt of your roof, shading from trees or buildings, and seasonal variations in sunlight. Ideally, your solar panels should face south (in the Northern Hemisphere) and be installed at an angle that maximizes exposure to the sun. Conducting a thorough site evaluation will help you optimize the placement and performance of your solar panels.
Setting a Budget
Budgeting is a critical step in planning your DIY solar power system. The cost of a solar power system can vary widely based on the size, quality of components, and installation complexity. Start by researching the prices of solar panels, inverters, batteries, mounting hardware, and other necessary components. Additionally, factor in the costs of permits, inspections, and any professional assistance you might need. Consider financing options such as solar loans, which can lower upfront costs and offer monthly payments that are often less than your current energy bills. Setting a realistic budget will help you make informed decisions and avoid unexpected expenses.
Choosing the Right Solar Power System Type
There are several types of solar power systems to choose from, each with its own advantages and considerations:
- Grid-Tied Systems: These systems are connected to the local utility grid, allowing you to draw power from the grid when your solar panels aren’t producing enough electricity. Excess energy generated by your system can be fed back into the grid, often earning you credits or payments through net metering. Grid-tied systems are typically less expensive and easier to install but do not provide power during grid outages.
- Off-Grid Systems: These systems operate independently of the utility grid and require battery storage to provide power when the sun isn’t shining. Off-grid systems are ideal for remote locations or those seeking complete energy independence. However, they are generally more expensive and complex due to the need for batteries and backup generators.
- Hybrid Systems: Combining the benefits of both grid-tied and off-grid systems, hybrid systems are connected to the grid but also include battery storage. This setup allows you to store excess energy for use during outages or peak demand times, providing greater flexibility and reliability. Hybrid systems are more costly but offer the best of both worlds.
Choosing the right type of system depends on your energy needs, budget, and personal preferences. By carefully considering these factors, you can select a solar power system that aligns with your goals and maximizes your investment in renewable energy.
Components of a DIY Solar Power System
When embarking on a DIY solar power project, understanding the key components of the system is crucial. Each part plays a vital role in ensuring the efficiency and reliability of your solar setup. Below, we delve into the essential components you will need.
Solar Panels
Solar panels are the heart of any solar power system. They capture sunlight and convert it into electricity. When selecting solar panels, consider factors such as efficiency, durability, and warranty. **Monocrystalline panels** are known for their high efficiency and sleek design, while **polycrystalline panels** are generally more affordable but slightly less efficient. Ensure that the panels you choose are certified and come with a robust warranty to protect your investment.
Inverters
Inverters are responsible for converting the direct current (DC) electricity generated by the solar panels into alternating current (AC) electricity, which is used by most household appliances. There are three main types of inverters:
- String Inverters: These are the most common and cost-effective option, suitable for installations where all panels receive uniform sunlight.
- Microinverters: These are installed on each solar panel, allowing for individual optimization and better performance in shaded conditions.
- Power Optimizers: These work in conjunction with string inverters to optimize the performance of each panel, offering a middle ground between string inverters and microinverters.
Batteries and Storage Solutions
Batteries store excess energy generated by your solar panels for use during periods of low sunlight or at night. This component is essential for achieving energy independence. **Lithium-ion batteries** are the most popular choice due to their high efficiency, long lifespan, and decreasing costs. **Lead-acid batteries** are a more affordable option but have a shorter lifespan and lower efficiency. When choosing a battery, consider its capacity, depth of discharge, and cycle life.
Mounting and Racking Systems
Mounting and racking systems secure your solar panels to your roof or ground installation. These systems must be durable and able to withstand various weather conditions. There are several types of mounting systems:
- Roof Mounts: Ideal for homes with sufficient roof space and good sunlight exposure. They come in different designs to accommodate various roof types.
- Ground Mounts: Suitable for properties with ample land. They offer flexibility in panel orientation and tilt, which can optimize energy production.
- Tracking Systems: These advanced systems adjust the angle of the panels throughout the day to follow the sun, maximizing energy capture. However, they are more expensive and require more maintenance.
Monitoring and Control Systems
Monitoring and control systems allow you to track the performance of your solar power system in real-time. These systems can provide insights into energy production, consumption, and system health. Many modern inverters come with built-in monitoring capabilities, but standalone monitoring systems are also available. Look for features such as:
- Remote Monitoring: Access your system’s data from anywhere using a smartphone or computer.
- Alerts and Notifications: Receive alerts for any issues or maintenance needs.
- Data Analytics: Analyze historical data to optimize system performance and identify trends.
Understanding these components and their functions will help you design and install an efficient and reliable DIY solar power system. Each component must be carefully selected and integrated to ensure optimal performance and longevity of your solar setup.
Step-by-Step Guide to Installing Your DIY Solar Power System
Preparing Your Site
Before you begin installing your solar power system, it’s crucial to prepare your site properly. Start by selecting an optimal location for your solar panels, typically a roof or a ground-mounted area that receives maximum sunlight throughout the day. Clear any obstructions such as trees, debris, or other structures that might cast shadows on your panels. Ensure the surface is clean and structurally sound to support the weight of the solar panels and mounting equipment.
Installing Solar Panels
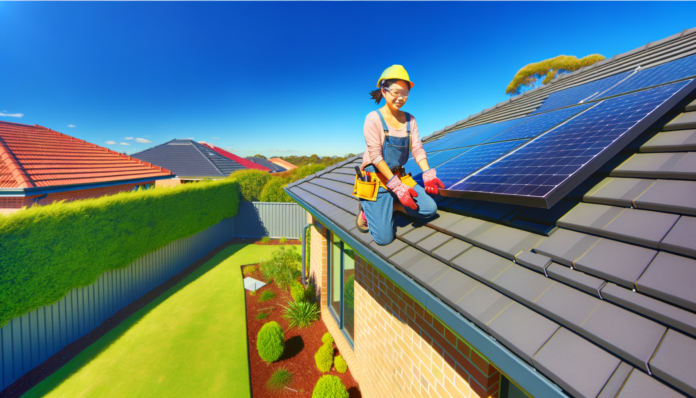
Once your site is prepared, you can begin installing the solar panels. Follow these steps:
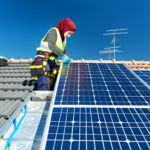
1. **Install the Mounting System**: Secure the mounting brackets to your roof or ground structure. Ensure they are aligned and spaced according to the manufacturer’s specifications.
2. **Attach the Solar Panels**: Carefully place the solar panels onto the mounting brackets and secure them with bolts or clamps. Double-check that each panel is firmly attached and properly aligned.
3. **Wiring the Panels**: Connect the solar panels in series or parallel configurations, depending on your system design. Use appropriate connectors and ensure all connections are tight and weatherproof.
Connecting the Inverter
The inverter is a critical component that converts the direct current (DC) generated by the solar panels into alternating current (AC) used by your home appliances. Follow these steps to connect the inverter:
1. **Mount the Inverter**: Choose a cool, shaded location near your main electrical panel to mount the inverter. This helps in maintaining its efficiency and longevity.
2. **Connect the DC Input**: Run the DC wires from the solar panels to the inverter and connect them to the designated DC input terminals.
3. **Connect the AC Output**: Run the AC wires from the inverter to your home’s main electrical panel and connect them to the appropriate circuit breaker.
Setting Up Battery Storage
If your system includes battery storage, follow these steps to set it up:
1. **Install the Battery Bank**: Place the batteries in a well-ventilated, temperature-controlled area. Ensure they are securely mounted and protected from environmental factors.
2. **Connect the Batteries**: Wire the batteries in series or parallel configurations as per your system design. Use appropriate connectors and ensure all connections are secure.
3. **Connect to the Inverter**: Run the battery cables to the inverter and connect them to the designated battery input terminals. Ensure all connections are tight and properly insulated.
Testing and Troubleshooting
After completing the installation, it’s essential to test and troubleshoot your system to ensure it operates correctly:
1. **Initial Power-Up**: Turn on the inverter and check the system’s initial power-up sequence. Ensure all components are functioning correctly.
2. **Monitor Performance**: Use the monitoring system to check the performance of each solar panel, the inverter, and the battery storage. Look for any discrepancies or issues.
3. **Troubleshoot Issues**: If you encounter any problems, refer to the manufacturer’s troubleshooting guide. Common issues include loose connections, faulty wiring, or shading on the panels.
By following these steps, you can successfully install your DIY solar power system and start harnessing the sun’s energy to power your home.
Maintenance and Optimization
Regular Maintenance Tasks
Maintaining your DIY solar power system is crucial to ensure its longevity and efficiency. Here are some regular maintenance tasks you should perform:
- Cleaning Solar Panels: Dust, dirt, and debris can accumulate on your solar panels, reducing their efficiency. Clean the panels with water and a soft brush or cloth every few months, or more frequently if you live in a dusty area.
- Inspecting for Damage: Regularly check your solar panels, inverters, and other components for any signs of physical damage, such as cracks or corrosion. Address any issues promptly to prevent further damage.
- Monitoring Performance: Use your monitoring system to keep an eye on the performance of your solar power system. Look for any significant drops in energy production, which could indicate a problem that needs attention.
- Checking Electrical Connections: Ensure that all electrical connections are secure and free from corrosion. Loose or corroded connections can lead to inefficiencies and potential safety hazards.
- Trimming Nearby Vegetation: Trees and shrubs can grow and cast shadows on your solar panels, reducing their efficiency. Regularly trim any vegetation that could obstruct sunlight from reaching your panels.
Optimizing System Performance
To get the most out of your DIY solar power system, consider these optimization strategies:
- Panel Orientation and Tilt: Ensure that your solar panels are oriented and tilted to capture the maximum amount of sunlight. In the northern hemisphere, panels should generally face south, while in the southern hemisphere, they should face north. Adjust the tilt angle based on your latitude and the season.
- Using High-Efficiency Panels: If you have the budget, invest in high-efficiency solar panels. These panels can generate more electricity from the same amount of sunlight, maximizing your system’s output.
- Implementing Energy Storage Solutions: Adding battery storage to your system can help you store excess energy generated during the day for use at night or during cloudy periods. This can increase your energy independence and reduce reliance on the grid.
- Regular Software Updates: Keep your monitoring and control systems updated with the latest software. Manufacturers often release updates that can improve system performance and add new features.
- Energy Management Practices: Implement energy-saving practices in your home, such as using energy-efficient appliances and reducing unnecessary energy consumption. This can help you make the most of the energy generated by your solar power system.
Upgrading Your System
As technology advances, you may want to consider upgrading your DIY solar power system to take advantage of new innovations:
- Adding More Panels: If your energy needs increase or if you have additional space, consider expanding your system by adding more solar panels. This can help you generate more electricity and further reduce your reliance on the grid.
- Upgrading Inverters: Modern inverters are more efficient and offer better performance monitoring capabilities. Upgrading to a newer inverter can improve your system’s overall efficiency and provide more detailed insights into its performance.
- Integrating Smart Home Technology: Smart home devices can help you manage and optimize your energy usage. Consider integrating your solar power system with smart thermostats, lighting, and appliances to maximize energy efficiency.
- Switching to Advanced Battery Storage: Newer battery technologies, such as lithium-ion batteries, offer better performance and longer lifespans compared to older battery types. Upgrading your battery storage can enhance your system’s reliability and energy storage capacity.
- Exploring Emerging Technologies: Stay informed about emerging solar technologies, such as bifacial panels, which can capture sunlight from both sides, or solar tiles that integrate seamlessly with your roof. These innovations can offer improved aesthetics and performance.
By regularly maintaining and optimizing your DIY solar power system, you can ensure it operates at peak efficiency, providing you with clean, renewable energy for years to come.
Safety Considerations
Electrical Safety
When installing a DIY solar power system, **electrical safety** is paramount. Working with electrical components such as inverters, batteries, and wiring can pose significant risks if not handled correctly. Here are some key points to consider:
- Turn Off Power: Before starting any installation, ensure that all power sources are turned off. This includes the main electrical panel and any existing solar components.
- Use Proper Tools: Utilize insulated tools and wear rubber-soled shoes to minimize the risk of electrical shock.
- Follow Manufacturer Guidelines: Always adhere to the installation guides provided by the manufacturers of your solar components. These guides often include specific safety protocols.
- Grounding: Properly ground all electrical components to prevent electrical faults and ensure system stability.
- Professional Inspection: Even if you are confident in your DIY skills, it is advisable to have a certified electrician inspect your system before turning it on.
Weather and Environmental Considerations
The environment in which you install your solar power system can significantly impact its safety and performance. Here are some factors to keep in mind:
- Weather Conditions: Avoid installing your system during adverse weather conditions such as rain, snow, or high winds. Wet surfaces can be slippery, and strong winds can make handling solar panels dangerous.
- Sun Exposure: Install your system during cooler parts of the day, such as early morning or late afternoon, to avoid heat-related issues and ensure better working conditions.
- Protective Gear: Wear appropriate clothing, including long sleeves, pants, gloves, and safety goggles. Use sunscreen and stay hydrated to protect yourself from sunburn and heat exhaustion.
- Environmental Hazards: Be aware of potential environmental hazards such as falling debris, tree branches, or wildlife that could interfere with your installation.
Legal and Regulatory Compliance
Compliance with local laws and regulations is crucial for the safe and legal installation of your DIY solar power system. Here are some steps to ensure you meet all necessary requirements:
- Permits: Obtain all required permits from your local government or regulatory body before starting your installation. This may include building permits, electrical permits, and zoning approvals.
- Building Codes: Ensure that your installation complies with local building codes and standards. This includes structural requirements for mounting systems and electrical codes for wiring and connections.
- Utility Company Coordination: Notify your utility company about your solar installation. They may need to inspect your system and approve its connection to the grid.
- Insurance: Check with your homeowner’s insurance provider to ensure that your solar power system is covered under your policy. Some insurers may require specific safety measures or inspections.
- Tax Incentives: Be aware of any tax incentives or rebates available for solar installations in your area. Ensure that your installation meets the criteria to qualify for these benefits.
By adhering to these safety considerations, you can ensure a safer and more efficient DIY solar power system installation. Prioritizing electrical safety, being mindful of environmental conditions, and complying with legal and regulatory requirements will help you harness the sun’s power effectively and responsibly.
Conclusion and Future Trends
Recap of Key Points
As we conclude our exploration of DIY solar power systems for homeowners, it’s essential to recap the key points discussed. We began by understanding the importance and benefits of solar power, emphasizing its role in reducing energy costs and promoting sustainable living. We then delved into the planning phase, covering how to assess energy needs, evaluate sunlight exposure, set a budget, and choose the right system type. The components of a solar power system, including solar panels, inverters, batteries, mounting systems, and monitoring tools, were thoroughly examined. A step-by-step guide to installation provided practical insights, followed by maintenance tips to ensure optimal performance. Lastly, we highlighted safety considerations to keep in mind throughout the process.
Emerging Technologies in Solar Power
The solar power industry is continuously evolving, bringing forth innovative technologies that promise to enhance efficiency and accessibility. Some of the most exciting advancements include:
- Next-Generation Solar Panels: New materials and designs, such as bifacial panels and perovskite solar cells, are increasing the efficiency and reducing the cost of solar panels.
- Advanced Energy Storage Solutions: Lithium-ion batteries remain popular, but emerging technologies like solid-state batteries and flow batteries offer higher storage capacities and longer lifespans.
- Smart Grid Integration: AI-powered systems and smart grids are enabling better energy management, allowing homeowners to optimize their energy use and participate in energy trading.
- Solar Tracking Systems: These systems adjust the angle of solar panels throughout the day to maximize sunlight capture, significantly boosting energy production.
- Building-Integrated Photovoltaics (BIPV): Solar panels are being integrated into building materials, such as windows and roof tiles, making solar power more aesthetically pleasing and space-efficient.
Encouragement for DIY Enthusiasts
For DIY enthusiasts, the journey of installing a solar power system can be incredibly rewarding. Not only does it offer the satisfaction of creating a sustainable energy solution, but it also provides significant cost savings and energy independence. Here are a few words of encouragement:
- Start Small: If you’re new to solar power, consider starting with a smaller project, such as a solar-powered outdoor lighting system, to build your confidence and skills.
- Leverage Resources: Numerous online resources, forums, and communities are available to provide guidance and support. Don’t hesitate to seek advice and share your experiences.
- Stay Informed: The solar industry is rapidly evolving. Keep up with the latest trends and technologies to ensure your system remains efficient and up-to-date.
- Enjoy the Process: Embrace the learning curve and enjoy the process of creating a greener, more sustainable home. Your efforts contribute to a healthier planet and a brighter future.
In conclusion, harnessing the power of the sun through DIY solar power systems is a practical and impactful way for homeowners to contribute to a sustainable future. With the right planning, components, and a bit of enthusiasm, you can transform your home into an eco-friendly haven. The future of solar power is bright, and by staying informed and engaged, you can be at the forefront of this exciting energy revolution.
