

Introduction to Solar Panels
Why Build Your Own Solar Panels?
Building your own solar panels can be an incredibly rewarding experience. For many, the primary motivation is the desire to understand how solar energy works and to gain hands-on experience in renewable energy technology. Additionally, constructing your own solar panels can be significantly more cost-effective than purchasing commercially built ones. While commercial solar panels can be expensive, building your own allows you to save on labor and manufacturing costs. Moreover, the process of building your own solar panels can be an educational adventure, providing valuable insights into the mechanics of solar energy systems.
Understanding Solar Energy
Solar energy is harnessed from the sun’s rays and converted into electricity using photovoltaic (PV) cells. These cells are made from semiconductor materials, typically silicon, which generate an electric current when exposed to sunlight. The energy produced by solar panels can be used to power homes, businesses, and even vehicles. Solar energy is a clean, renewable resource that reduces reliance on fossil fuels and decreases greenhouse gas emissions. Understanding the basic principles of how solar energy is captured and converted is crucial for anyone looking to build their own solar panels.
Benefits of DIY Solar Panels
There are numerous benefits to building your own solar panels:
- Cost Savings: One of the most significant advantages is the potential for cost savings. By sourcing materials yourself and eliminating labor costs, you can build a solar panel system at a fraction of the price of a commercial system.
- Educational Value: The process of building your own solar panels is a fantastic learning opportunity. It allows you to gain a deeper understanding of renewable energy technologies and electrical systems.
- Customization: DIY solar panels can be tailored to meet your specific energy needs and spatial constraints. You have the flexibility to design a system that fits your unique requirements.
- Environmental Impact: By generating your own solar power, you contribute to reducing carbon emissions and promoting sustainable energy practices.
- Sense of Accomplishment: Completing a DIY solar panel project can be incredibly satisfying. It provides a sense of achievement and the confidence to tackle other DIY projects in the future.
In summary, building your own solar panels offers a blend of financial savings, educational enrichment, and environmental benefits. Whether you’re a student, a hobbyist, or someone looking to reduce their carbon footprint, embarking on a DIY solar panel project can be a fulfilling and impactful endeavor.
Materials and Tools Needed
Essential Materials
To build your own solar panels, you’ll need a variety of materials that are essential for the construction and functionality of the panels. Here is a list of the primary materials you will need:
- Solar Cells: These are the heart of your solar panel. They convert sunlight into electricity. You can purchase them online or from specialized stores.
- Tabbing Wire: This wire is used to connect the solar cells together. It is usually pre-soldered with a thin layer of solder to make the connection process easier.
- Bus Wire: This thicker wire is used to connect the strings of solar cells to each other and to the junction box.
- Encapsulation Material: Typically, this is a sheet of glass or a specialized plastic that protects the solar cells from the elements.
- Backsheet: This is a layer of material that provides structural support and protection for the back of the solar panel.
- Junction Box: This is where the electrical connections are made. It usually includes diodes to prevent backflow of electricity.
- Silicone Sealant: Used to seal the edges of the panel and protect it from moisture.
- Frame Material: Usually aluminum, this provides structural integrity to the panel.
Required Tools
Building a solar panel requires a set of tools to ensure that all components are properly assembled and connected. Here are the tools you will need:
- Soldering Iron: Essential for connecting the tabbing wire to the solar cells. Make sure it has a fine tip for precision work.
- Multimeter: Used to test the electrical connections and ensure that the solar cells are producing the expected voltage and current.
- Wire Cutters and Strippers: These are used to cut and strip the tabbing and bus wires to the correct lengths.
- Flux Pen: Helps the solder to flow more easily and create a better connection between the wires and the solar cells.
- Heat Gun: Useful for shrinking heat shrink tubing around electrical connections to protect them.
- Drill: Needed for making holes in the frame and backsheet for mounting and wiring.
- Clamps: Useful for holding components in place while the adhesive or sealant dries.
- Measuring Tape and Ruler: Essential for ensuring that all components are cut and placed accurately.
Safety Equipment
Safety should always be a priority when working on any DIY project, especially one involving electrical components. Here is the safety equipment you should have on hand:
- Safety Goggles: Protect your eyes from solder splashes, glass shards, and other debris.
- Gloves: Use insulated gloves when handling electrical components to protect against electric shock. Heat-resistant gloves are also useful when soldering.
- Respirator Mask: Protects you from inhaling fumes from soldering and other chemicals.
- Fire Extinguisher: Always have a fire extinguisher nearby when working with electrical components and soldering irons.
- First Aid Kit: Keep a first aid kit handy for any minor injuries that may occur during the construction process.
By gathering these materials, tools, and safety equipment, you’ll be well-prepared to start building your own solar panels. Proper preparation ensures a smoother construction process and a more efficient and durable final product.
Step-by-Step Construction Guide
Preparing the Solar Cells
Before you start assembling your solar panel, you need to prepare the solar cells. Solar cells are the heart of your solar panel, converting sunlight into electricity. Here’s how to get them ready:
- Inspect the Cells: Check each cell for any visible damage. Damaged cells can affect the efficiency of your panel.
- Clean the Cells: Use a soft cloth to gently clean the surface of each cell, removing any dust or debris.
- Tabbing Wires: Attach tabbing wires to the front and back of each cell. This involves soldering the wires to the cells, which will later connect them in series.
Building the Solar Panel Frame
The frame provides structural support and protection for your solar cells. Here’s how to build it:
- Measure and Cut: Measure the dimensions of your solar cells and cut the wooden or aluminum frame accordingly.
- Assemble the Frame: Use screws and brackets to assemble the frame. Ensure it is sturdy and square.
- Backboard: Attach a backboard (plywood or similar material) to the frame. This will hold the solar cells in place.
Wiring the Solar Cells
Wiring the solar cells together is a critical step in the construction process. Here’s how to do it:
- Series Connection: Connect the tabbing wires from the front of one cell to the back of the next cell. This creates a series circuit, increasing the voltage output.
- Bus Wires: Use bus wires to connect the rows of cells. Solder the bus wires to the tabbing wires, ensuring a secure connection.
- Check Connections: Use a multimeter to check the connections and ensure there are no breaks in the circuit.
Assembling the Solar Panel
Once the cells are wired, it’s time to assemble the panel:
- Place the Cells: Carefully place the wired cells onto the backboard within the frame. Ensure they are evenly spaced and aligned.
- Secure the Cells: Use a small amount of adhesive to secure the cells to the backboard. Be careful not to damage the cells.
- Connect to Junction Box: Attach the positive and negative leads from the bus wires to a junction box. This will allow you to connect the panel to your power system.
Sealing and Protecting the Panel
To ensure the longevity and efficiency of your solar panel, it’s essential to seal and protect it from the elements:
- Encapsulation: Apply a layer of encapsulant (such as EVA film) over the cells. This protects them from moisture and physical damage.
- Plexiglass Cover: Place a sheet of plexiglass or tempered glass over the encapsulant. This acts as a protective barrier against weather conditions.
- Seal the Edges: Use silicone sealant to seal the edges of the plexiglass to the frame. This prevents water and dust from entering the panel.
By following these steps, you’ll have a fully functional solar panel ready to harness the power of the sun. Remember to take your time and ensure each step is completed accurately for the best results.
Installation and Setup
Choosing the Right Location
Selecting the optimal location for your solar panels is crucial for maximizing their efficiency. Ideally, you want a spot that receives the most sunlight throughout the day. Here are some key considerations:
- Sunlight Exposure: Ensure the location gets at least 6-8 hours of direct sunlight daily. Avoid areas shaded by trees, buildings, or other obstructions.
- Orientation: In the Northern Hemisphere, solar panels should face true south to capture the most sunlight. In the Southern Hemisphere, they should face true north.
- Angle: The tilt angle of your panels should be equal to your latitude for optimal year-round performance. Adjustable mounts can help you tweak the angle seasonally.
Mounting the Solar Panels
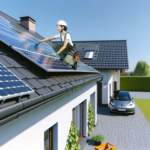
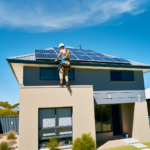
Once you’ve chosen the perfect location, the next step is to mount your solar panels securely. Here’s how to do it:
- Install the Mounting Hardware: Depending on your setup, you may use roof mounts, ground mounts, or pole mounts. Follow the manufacturer’s instructions to securely attach the mounting hardware.
- Attach the Panels: Carefully lift the solar panels and place them onto the mounting hardware. Use bolts and clamps to secure them in place. Ensure they are tightly fastened to withstand wind and other weather conditions.
- Check Alignment: Double-check the alignment and angle of the panels to ensure they are positioned correctly for maximum sunlight exposure.
Connecting to the Power System
After mounting the panels, the final step is to connect them to your power system. This involves wiring the panels and integrating them with your existing electrical setup.
- Wiring the Panels: Connect the solar panels in series or parallel, depending on your system’s voltage and current requirements. Use appropriate connectors and ensure all connections are secure and weatherproof.
- Install the Inverter: The inverter converts the DC electricity generated by the panels into AC electricity for household use. Mount the inverter close to your main electrical panel and connect it to the solar array.
- Connect to the Electrical Panel: Run the wiring from the inverter to your main electrical panel. This step may require a licensed electrician to ensure compliance with local electrical codes and safety standards.
- Install a Battery Bank (Optional): If you plan to store excess energy, connect a battery bank to your system. This allows you to use solar power even when the sun isn’t shining.
- Test the System: Once everything is connected, turn on the system and check for proper operation. Monitor the inverter and electrical panel to ensure the system is generating and distributing power correctly.
By carefully choosing the right location, securely mounting your panels, and properly connecting them to your power system, you can ensure your DIY solar panel setup is both efficient and reliable.
Maintenance and Troubleshooting
Regular Maintenance Tips
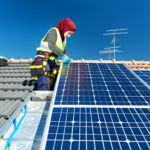
Maintaining your solar panels is crucial to ensure they operate efficiently and have a long lifespan. Here are some regular maintenance tips to keep your system in top shape:
- Regular Cleaning: Dust, dirt, and debris can accumulate on the surface of your solar panels, reducing their efficiency. Clean your panels at least twice a year using a soft brush or cloth and clean water. Avoid harsh chemicals or abrasive materials that could damage the panels.
- Inspect for Damage: Regularly check your solar panels for any signs of physical damage such as cracks, chips, or loose connections. Addressing these issues promptly can prevent further damage and ensure efficient energy production.
- Monitor Performance: Keep an eye on your system’s performance using monitoring software provided by your installer. This will help you identify any drops in energy production and troubleshoot potential issues early.
- Check Inverter Status: The inverter is a critical component that converts the DC electricity generated by your panels into AC electricity for use in your home. Regularly check the inverter’s status lights and monitor its performance to ensure it is functioning optimally.
Common Issues and Solutions
Even with regular maintenance, you may encounter some common issues with your solar panel system. Here are a few problems and their solutions:
- Reduced Energy Output: If you notice a significant drop in energy production, it could be due to shading, dirt accumulation, or a malfunctioning component. Clean the panels, check for shading issues, and inspect the inverter and wiring for any faults.
- Inverter Issues: If the inverter is not working correctly, it may show error messages or have a red or orange light instead of green. Refer to the inverter’s manual for troubleshooting steps or contact a professional for assistance.
- Physical Damage: Cracks or chips in the panels can occur due to severe weather or accidental impact. Small cracks might not immediately affect performance but should be repaired to prevent further damage. For significant damage, contact a professional for repair or replacement.
- Loose Connections: Over time, connections can become loose due to thermal expansion and contraction. Regularly inspect and tighten all electrical connections to ensure they are secure.
When to Seek Professional Help
While many maintenance tasks can be performed by the homeowner, certain situations require professional intervention:
- Significant Performance Drop: If you notice a substantial and unexplained drop in your system’s performance, it’s best to consult a professional to diagnose and fix the issue.
- Complex Electrical Issues: If you encounter complex electrical problems or are unsure about any aspect of the system’s wiring, it’s safer to call a qualified electrician or solar technician.
- Physical Damage: For significant physical damage to the panels or mounting system, professional repair or replacement is necessary to ensure safety and efficiency.
- Inverter Problems: Inverters are complex devices, and troubleshooting them can be challenging. If basic troubleshooting steps do not resolve the issue, contact a professional for assistance.
By following these maintenance tips and knowing when to seek professional help, you can ensure that your solar panel system continues to operate efficiently and reliably for many years.
Maximizing Efficiency
Optimizing Solar Panel Placement
Proper placement of your solar panels is crucial for maximizing their efficiency. The goal is to capture the maximum amount of sunlight throughout the day. Here are some key considerations:
- Orientation: In the Northern Hemisphere, solar panels should ideally face true south to capture the most sunlight. In the Southern Hemisphere, they should face true north.
- Angle: The tilt angle of your solar panels should be equal to your latitude for optimal year-round performance. Adjusting the angle seasonally can further enhance efficiency.
- Avoiding Shading: Ensure that your panels are not shaded by trees, buildings, or other obstructions, as even partial shading can significantly reduce their output.
Seasonal Adjustments
Seasonal changes in the sun’s position can affect the performance of your solar panels. Adjusting the tilt angle of your panels can help maintain optimal efficiency throughout the year:
- Winter: During winter months, the sun is lower in the sky. Increase the tilt angle of your panels by 15 degrees from your latitude to capture more sunlight.
- Summer: In summer, the sun is higher in the sky. Decrease the tilt angle by 15 degrees from your latitude to maximize exposure.
- Spring and Fall: Set the tilt angle to your latitude for these transitional seasons.
Using Solar Trackers
Solar trackers can significantly boost the efficiency of your solar panels by automatically adjusting their position to follow the sun’s path across the sky. There are two main types of solar trackers:
- Single-Axis Trackers: These trackers follow the sun from east to west throughout the day. They can increase energy production by 25-35% compared to fixed panels.
- Dual-Axis Trackers: These trackers adjust both the tilt and orientation of the panels, following the sun’s movement in all directions. They can boost energy production by up to 40% or more.
While solar trackers can enhance efficiency, they also add to the initial cost and require maintenance. Consider the following before investing in a solar tracker:
- Cost-Benefit Analysis: Weigh the increased energy production against the additional cost and maintenance requirements.
- Space Requirements: Trackers require more space than fixed panels, so ensure you have adequate room for installation.
- Climate Considerations: Trackers are more beneficial in areas with high solar irradiance and minimal shading.
By optimizing the placement of your solar panels, making seasonal adjustments, and considering the use of solar trackers, you can significantly enhance the efficiency of your DIY solar panel system. This will help you maximize energy production and achieve greater savings on your electricity bills.
Conclusion and Additional Resources
Summary of Key Points
Building your own solar panels is a rewarding endeavor that offers numerous benefits. Throughout this guide, we have covered the essential steps and considerations for constructing your own solar panels, from understanding the basics of solar energy to the detailed process of assembling and installing the panels. Here are the key takeaways:
- Cost Savings: DIY solar panels can significantly reduce the cost compared to purchasing pre-made panels.
- Customization: You have the flexibility to tailor the size, voltage, and power output to meet your specific energy needs.
- Materials and Tools: Essential materials like solar cells and tabbing wires are readily available and relatively inexpensive.
- Step-by-Step Guide: Following a detailed construction guide ensures that even those with basic technical skills can successfully build their own solar panels.
- Environmental Impact: DIY solar panels contribute to a more sustainable future by reducing reliance on fossil fuels and lowering carbon footprints.
Further Reading and Resources
To deepen your understanding and enhance your DIY solar panel project, consider exploring the following resources:
- Homeowner’s Guide to Going Solar – A comprehensive guide from the U.S. Department of Energy.
- Solar Power World – Industry news, insights, and technical articles on solar energy.
- Instructables: DIY Solar Panel and Battery Bank – A step-by-step tutorial with user-generated content and tips.
- Solar United Neighbors – Educational resources and community support for solar enthusiasts.
- Fenice Energy – Expert advice and support for DIY solar panel projects.
Community and Support Networks
Engaging with a community of like-minded individuals can provide invaluable support and inspiration for your DIY solar panel project. Here are some ways to connect with others:
- Online Forums and Groups: Join forums such as Reddit’s Solar Panels community or Solar Panel Talk to ask questions, share experiences, and get advice from fellow DIY enthusiasts.
- Local Workshops and Classes: Look for workshops or classes offered by local community colleges, renewable energy organizations, or environmental groups to gain hands-on experience and meet others interested in solar energy.
- Social Media: Follow solar energy pages and groups on platforms like Facebook, Twitter, and Instagram to stay updated on the latest trends, tips, and success stories.
- Professional Networks: Connect with professionals and experts in the field through LinkedIn or industry-specific events and conferences.
By leveraging these resources and networks, you can enhance your knowledge, troubleshoot issues, and stay motivated throughout your DIY solar panel journey. Building your own solar panels is not just a cost-effective and environmentally friendly project; it also connects you to a broader community dedicated to sustainable living and renewable energy.
